HOW TO SHOOT YOUR
BEST-EVER LANDSCAPES
Capture sensational scenics every time, with 10 expert tips from James Paterson that will help you plan for landscape perfection
Perhaps the best thing about landscape photography is that anybody can do it. You don’t P need mountains of kit, just mountains, an ocean or any scenic location. It doesn’t even need to be an epic scene; you can find all sorts of great photo opportunities on your doorstep. Whatever you choose to photograph, there’s something wonderful about heading out with a camera to capture the natural beauty around you.
But when we’re presented with a photo-worthy scene, what’s the best approach for capturing it? A successful landscape image is often down to making the right choices. These begin before you even arrive at your location – the timing, the weather forecast, the direction of the sun. Then there’s the host of technical and artistic decisions we make – camera settings, focal length, focusing and composition. Often these choices are made against the clock, as the sun rises or sets and the light changes, so it pays to head out with a few techniques up your sleeve, a camera trick or two to call upon or a plan of what to shoot and how to shoot it. In this feature, we’ll explore a variety of techniques to help you capture sensational landscape photos. These are all techniques that you can plan or practise in advance, so that when the crucial moment comes, you can be sure of landscape perfection…
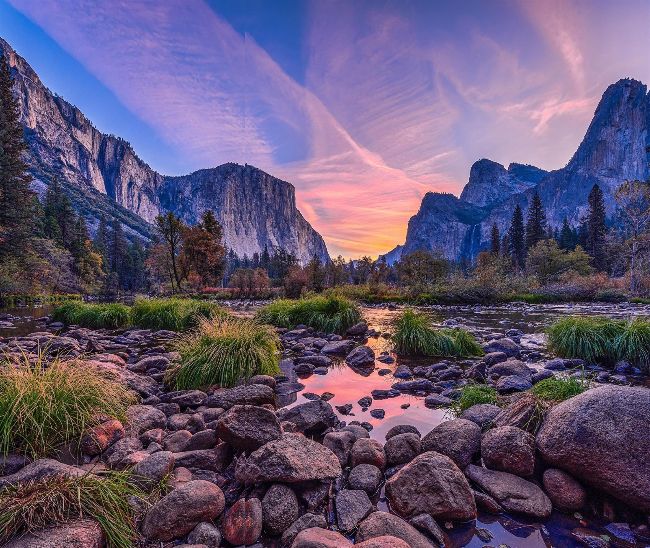
A successful landscape image is often down to making the right decisions when presented with a photo-worthy scene, including technical and artistic choices such as camera settings, focal length, focusing and composition.
Getty
PRO ADVICE MAKE A FOCUS STACK
After you’ve shot a focus stack, it’s easy to combine the sharpest parts together if you have an automated stacking tool that does the job for you. In Photoshop, open the set of images as a layer stack then use the Auto-Align and Auto-Blend features. If you’re an Affinity Photo user, the Focus Merge feature is just as good. For the serious stacker, a dedicated stacking tool like Helicon Focus gives you more control.
1 FOCUS STACK YOUR IMAGES
For supreme sharpness across the whole frame, try experimenting with your camera’s focus stacking feature
Have you ever looked at another photographer’s photos and wondered, ‘How H on earth do they get them so sharp?’ It’s partly down to lens quality, but your choice of aperture is important too. Lenses are usually sharpest around two or three stops down from the maximum aperture. So for a maximum aperture of f/4, this means you will get greater sharpness between f/8 and f/11.
This presents a conundrum, as a mid-range aperture won’t give you the maximum depth of field, so some areas might come out soft. Focusing one-third of the way into the scene can help as the plane of sharpness extends two-thirds beyond and one-third in front of that point.
Even so, front-to-back sharpness might still be a challenge and this is where focus stacking can help. Most modern cameras will have a focus stacking mode and, if not, you can do it manually. Using a tripod, focus on the closest spot then engage the mode to take a series of shots while the focus point moves incrementally backwards through the scene.
Once that’s done, we can combine all the sharpest parts. You can practise focus stacking at home to familiarise yourself with the settings – it’s particularly useful for macro photography, too.