BLENDER
Render real-world 3D maps in Blender
Credit: www.blender.org
Intrepid Michael Reed explores real-world maps by never leaving his home and rendering them in Blender using various data sets.
OUR EXPERT
Michael Reed has spent more time working on his Blender skills than an awardwinning chef.
QUIK TIPS
Our Blender doesn’t look quite the same as your Blender? We selected the light theme so that it looks better in the magazine.
D graphics editor Blender can adapt to many different tasks, so we’re going to use it to 3 render 3D maps sourced from real-world data. The process is fairly simple and doesn’t require much in the way of Blender experience. You can take the map and height data resources from a variety of sources. What you end up with is a 3D terrain you can zoom, rotate, fly through and render. With Blender’s facilities, you can even animate the resulting object.
We need a 2D map image of some kind, along with a heightmap. In this case, a heightmap is a bitmap image in which the brightness of each pixel represents the height of that part of the map. When we combine the two, we have a 3D model of a map, ready for rendering.
You can use a variety of free online data sources for the map image and the height data. You’re not even confined to using it for real-world map rendering because you can also use a variety of computergenerated, mathematical images as input sources.
Acquiring the data
The first thing we need to do is to acquire some map data. For the method that we’re going to use, we require two images: a heightmap and a second image to ‘drape’ over that heightmap. The great thing about working like this is that it gives us a lot of flexibility in terms of the images that we can use. See the box (opposite) for tips on sourcing suitable heightmap and map image files. One thing to look out for: make sure you are selecting a geographical region that is mountainous so that you can see the 3D effect.
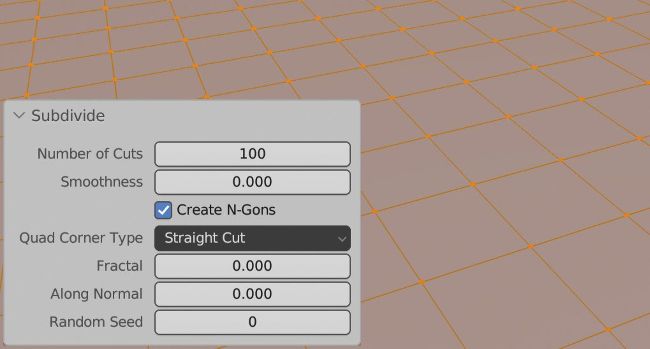
Once subdivided, the surface of this plane is made up of many smaller rectangular faces.
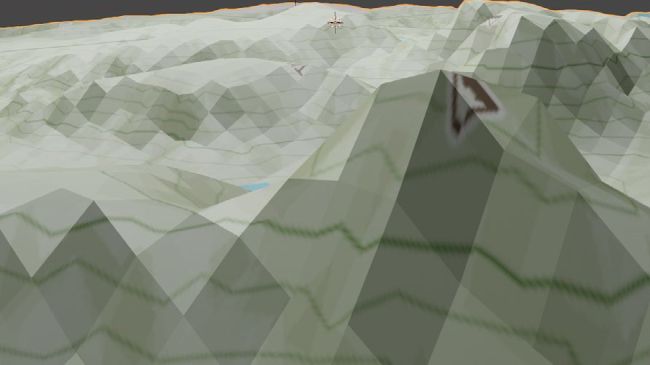
Zoomed in – before smooth shading and the subdivision modifier, the terrain is quite crude.
A quick cleanup
It’s worth giving the heightmap and the map image data a quick clean up, and for this, we’ll use the image editor GIMP. The source images we’re dealing with might have something like stray text or an unwanted detail here and there. Most of these instructions can be applied equally to both the map image and heightmap.
Any elements we need to remove can be worked on with GIMP’s Paintbrush tool. Use the Eyedropper to select the background colour of the map and then remove anything we don’t need with the Paintbrush. The Clone tool and the Healing tool may also be useful for this work. The only tools we shouldn’t use in GIMP are those that change the size of the image, such as the crop or scale tools. That’s because we need the heightmap and the map image to line up perfectly.