RISC-V
Build a RISC-V LED sign
Tam Hanna takes the GigaDevice RISC-V microcontroller for a spin and creates a gadget that displays impolite messages in large red letters.
Credit: www.gigadevice.com
Buckle in kids, this isn’t a project for the fainthearted or novice electronic tinkerer. Before B we can deal with the RISC-V hardware, we need to deal with our software development environment. Visit www.nucleisys.com/download.php and right-click Nuclei Studio IDE > Linux x86-64 to start the download – the servers are not particularly fast, so the process will take a bit of time. After that, untar the archive and start it in a terminal, as follows:
$ cd ~/Downloads/NucleiStudio
$ ./install.sh
$ ./NucleiStudio
Nuclei Studio asks for a workspace folder – the default can be accepted. Once started, click File > New > New Nuclei RISC-V C/C++ Project to make the IDE pop up an alert about missing packages. In addition to that, the Nuclei package management window also shows up.
It is a little inconveniently designed, as the dialog only downloads one component at a time – tick multiple boxes and the download is refused.
Select one of the items shown in the screenshot (below) and click the Download button next to the combo box marked Save To User Path. After the download is complete, proceed to the next package – repeat until all packages shown are available.
The IDE indicates downloaded packages by displaying a green light in the status column of the package management dialog.
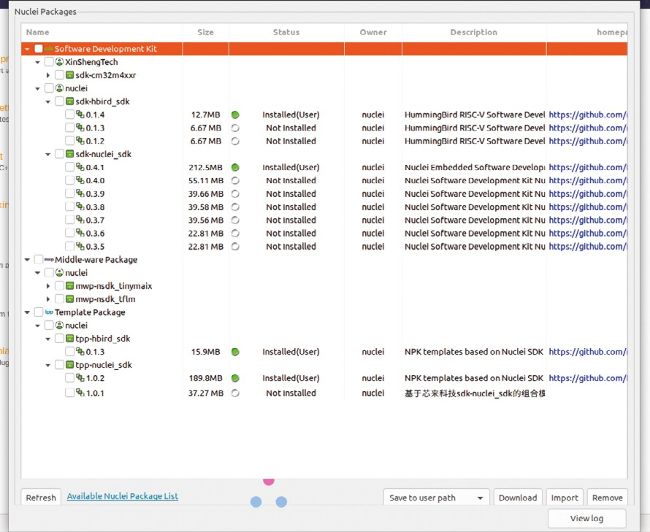
Get yourself the right packages for this RISC-V board.
We suggest you use the GigaDevice GD32VF103 RVSTAR board.
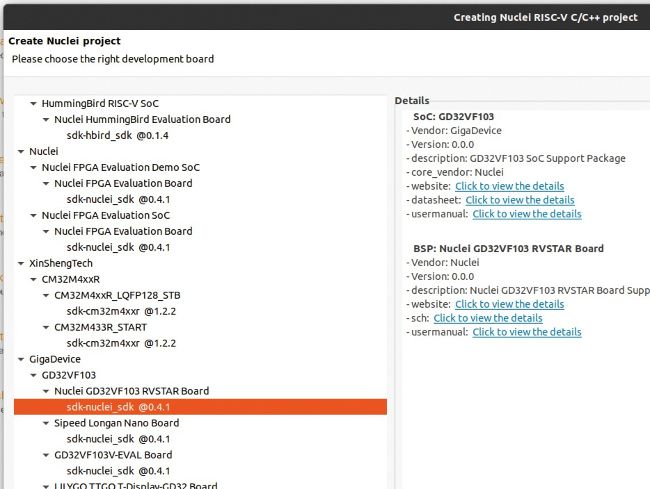
After all components are downloaded successfully, select the option File > New > New Nuclei RISC-V C/C++ Project to start the project generator. The assistant asks you to select a project configuration – we recommend the one in the screenshot (above).
Click Next to proceed to the project configuration. GigaDevice keeps an open ecosystem and permits the use of various real-time operating systems. Most of the options can be taken as they are – the only important choice involves the project example field, where the string ‘Helloworld @app-nsdk_helloworld’ should be selected. Assign a name to the project, too.
Also, be careful that the string 2K is found in both the heap size and the stack size windows – scooting around the dialog and going back and forth a little can delete these values. After clicking the Finish button, Nuclei Studio generates the project structure.
NMSIS contains generic software libraries and is not of significant interest. Relevant files can be found in the SOC folder – gd32vf103/Board contains files intended for the large evaluation board, while gd32vf103/Common contains hardware drivers.
If you’re used to classic development environments, you’ll get a surprise when switching to microcontrollers – the driver code required for peripherals is usually part of the project. Look at gd32vf103_gpio.h – it contains declarations required for accessing the GPIO unit.
When working with GigaDevice MCUs, have the firmware reference library to hand. Go to https:// gd32mcu.com/en/download/0?kw=GD32VF1 and click the GD32VF103 Firmware Library link – when done, extract the archive to access the sample code.