Camera College
The complete guide to modern photography
Take your first steps into flower photography

Marcus Hawkins
Photographer and writer Marcus is a former editor of Digital Camera
Photo challenge!
You could win a copy of Affinity Photo
See page 81
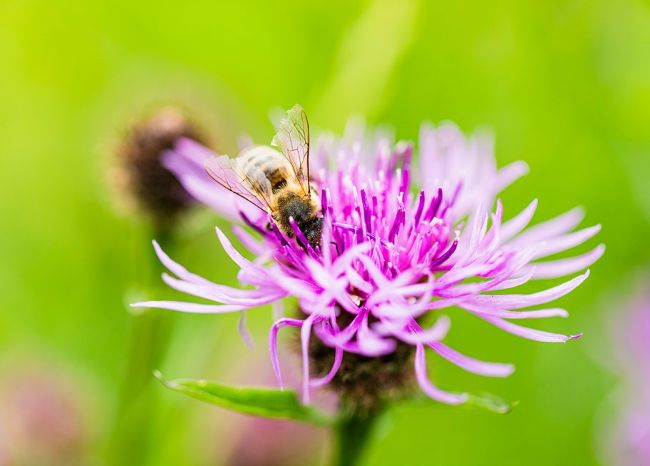
It’s easy to fire off a snap of a bee or insect on a flower (above) – but look at that background! For a better shot (right), get down low, line up a clean backdrop and lie in wait…
Learn how to capture intimate portraits of the flamboyant stars of the plant world, with our guide to focusing, exposure, creative tricks and more…
The secret to good flower photography is timing. If you’re photographing flowers in the wild or in a garden setting, you’ll only get a limited period of weeks, or even days, when the subjects will look their finest. The time of day can also make a big difference. While some flowers open and close with the rhythm of the sun, it’s the wind that’s more of a problem for photographers. As the day warms and things start to move, attempting a sharp shot of a flower outdoors can be a lesson in frustration. The slightest puff of air can send tall flowers knocking like a metronome, Sometimes there’s nothing for it but to make an early start in (relatively) still air.
Flower photography can take on many forms, from scientific close-up studies to sweeping floral scenics. As a result, you can put any lens to good use. A standard zoom gives you plenty of creative options – even more so if it reaches beyond 100mm. Longer focal lengths are easier to compose with, as they enable you to be more selective with the background. A dedicated macro lens is perfect, too, as you’ll have the option of focusing much closer for flower details.
Although a lightweight, imagestabilised standard zoom or 100mm macro lens can be a great choice when you’re paying a visit to a formal garden, in many situations a tripod is still unbeatable. For a start, it frees up both your hands for holding reflectors, flashguns and other accessories in place, and it allows you to manually focus with repeatable precision. It also allows you to keep the camera locked on a subject while you wait for the breeze to die down.
Depth of field
Experiment with different apertures and focal points
Depth of field is an important consideration for flower photography. The closer you are to the subject, the less depth of field (or depth of sharpness) you have to work with, so the choice of aperture plays a key role. Narrower apertures, such as f/16 and f/22, increase the depth of field, while wider apertures reduce it. On the face of it, you might think you need a narrow aperture so that everything looks sharp, but the large degree of blur you get from working with a wide aperture can really suit the soft, delicate features of a flower – although you’ll really need to get your focus bang-on.
Whichever route you prefer, it’s usually a good idea to keep away from aperture extremes. Select the narrowest aperture (f/22, say), and details will look soft, despite the increased depth of field. Select the widest option (f/2.8, for example) and in-focus areas might not look as sharp as they do at f/4.
If you’re shooting wide shots of flower beds, the depth of field is less critical, and a mid-range aperture of f/8 may give you all the detail you need.
Work in Aperture Priority or Manual mode so that you’re able to choose the aperture yourself, then experiment with the options to get the best result.
Blurred vision Using a wide aperture such as f/3.5 helps to provide some separation between the parts of the flower, blurring the background, to create a more dreamy effect, with a smaller depth of field. This draws more focus to the thistle itself.
f/11
f/3.5
Background When you’re working with a wide aperture (f/3.5 here), take a series of photos where you’ve selectively focused on different parts of the subject, so that you have plenty of options to choose between later.