HOUDINI 18.5 AND HOUDINI ENGINE | UNREAL ENGINE 5.0.3
GENERATE A PROCEDURAL MAZE IN HOUDINI
Adapting the disjoint data set algorithm and VEX

Jingtian Li
AUTHOR
A professor at the University of the Incarnate Word specialising in 3D art, rigging, programming, and indie game development. bit.ly/3xL2fhw
Houdini has been gaining increasing popularity in the game industry for its powerful VFX and procedural modelling capabilities. Although learning the software is difficult, the reward is also tremendous. While it is important to learn the nodes and functionalities of this gigantic software, another very important aspect is often overlooked by beginners – data structure and algorithm.
This computer science-related topic might seem alien, but the nature of Houdini is visual scripting; building procedural logic to generate assets is no different from developing a piece of software, and algorithms play a big role in the process. This article introduces a simple yet powerful data structure called disjoint data set. With its ‘find set’ and ‘union set’ operations, a working maze can be quickly generated.
Another powerful tool Houdini provides is VEX, a scripting language to allow quick implementation of a procedure. VEX coding is used heavily in this tutorial to quickly achieve results. Readers are expected to have a basic understanding of the language, as well as the basics of Houdini.
Please note that Houdini Apprentice will not work fully as it disallows the creation of a Houdini digital asset.
DOWNLOAD YOUR RESOURCES For all the assets you need go to https://bit.ly/3Dworld-292
Uniformed sizes A fundamental technique for procedural level generation is to use uniformed sizes. The length, width and height of the pieces should be the same or can be combined to achieve the same size with a bigger piece. This way, it is easy to place structures without worrying about gaps or overlapping. This tutorial uses 200 as the base size.
01
PREPARE THE
TESTING ASSETS
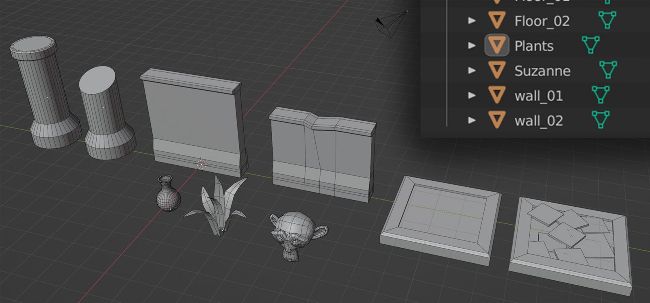
Create a set of testing models in Blender first. Here, the models include two walls, two floors, two columns, and some random set dressing assets. Suzanne has been created to represent an object to be placed at the dead ends.
The floors are squares with an edge length of two metres. The wall is two metres tall and two metres long. The columns are two metres high with an arbitrary radius slightly bigger than the thickness of the wall. The other assets are of an arbitrary size. Export them individually as FBX files.
02 C
REATE
THE
CURVE BASE
Make a new file in Houdini, and create a new geometry node. Name it ‘main’. Inside the main geometry node, create a curve node, and name it ‘base_shape’. In the viewport, hit enter, click to add new points, and keep on adding until a floor plane for the maze is established. Make sure to zoom out enough so your floor plane is bigger than the two-metre base size of the assets. Make sure to click on the first point created to close the curve, and a face should appear. This shape marks the outer range of the floor of the maze.
03
FLOOR BOUNDING BOX
Create a Transform node, name it ‘flatten’, and connect base_ shape to it. In the properties panel, set the second slot of the Scale attribute to 0 (scale Y), this should flatten the face. Add a Divide node to triangulate the geometry. Finally, add a Bound node, set the Bounding Type to Rectangle, and name it ‘get_floor_bound’. The resulting geometry should be a flattened bounding box of the floor.