DREAMS (PLAYSTATION) | MIDJOURNEY | PHOTOSHOP
BUILDING SCENES WITH AI AND DREAMS
Practical tips and tutorials from pro artists to improve your CG skills
Learn how to utilise AI-generated references to inspire your 3D creations in PlayStation design hit Dreams
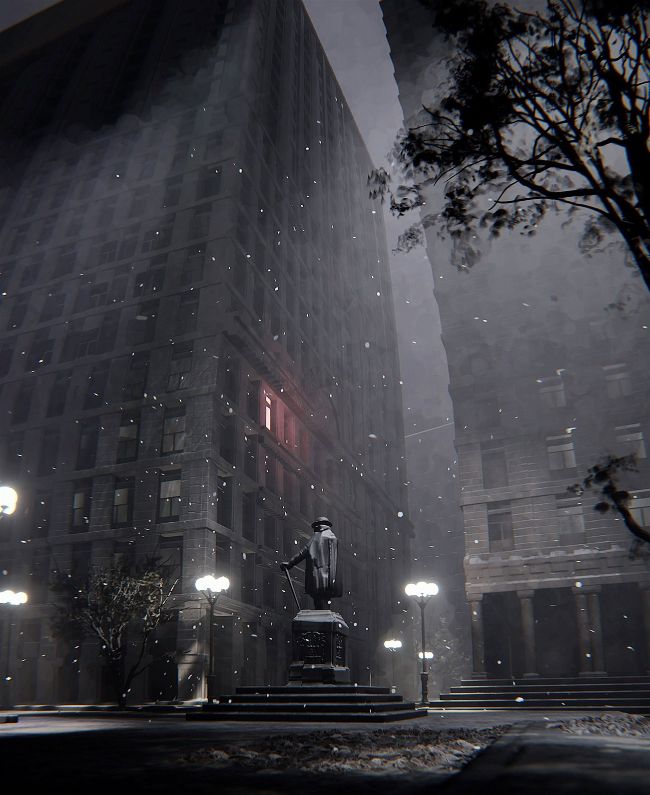
NEW YORK CIT Y, 1885 The main scene in a small cinematic that describes how a famous archaeologist died under mysterious circumstances after an excavation in Egypt
References created using AI tools can be a power ful way to inspire scenes in your creations, and in this tutorial I’ll guide you through the process of using them in Dreams. We’ll be creating an intro scene for a horror game, telling the stor y of a famous archaeologist who died under mysterious circumstances in a hotel room in New York in 1885. Since his death, his family has been haunted by a strange curse that began with an excavation he led in Egypt.
First we’ll use Dreams to build a rough sketch of a New York street corner, focusing on the layout and mood. We’ll then take a screenshot to use as a base image for Image2image in Midjourney. Image2image allows you to direc t Midjourney or other AI systems in a more controlled manner, and will generate a collec tion of images we can use as inspiration for the final scene.
Using AI-generated images as a star ting point, we’ll use Dreams to add details and features to the scene, refining and enhancing it until we’re satisfied. We’ll be using some of the most up-todate techniques in Dreams, such as the new Sticker tech, which allows you to easily apply tex tures to single objec ts, large groups, or even your whole scene.
The tutorial requires some knowledge of Dreams. For a good, basic understanding, I recommend going through the tutorials that come pre-installed. Using motion controllers will also give you the best experience.
01
01 BUILD MODULES
Launch Dreams and selec t Sculpt Mode. Pick the Cube Sculpt tool to build the first modular shapes of a sk yscraper. This should be a loose and rough sketch that captures the overall layout and mood of the scene, so don’t worr y too much about precision or design at this point. That said, I do recommend using the guide tools in Dreams like Grid and Precise Move.
At any point in this process, you can test out the look of your module by quickly doing a Multiclone operation using L1+R2, followed by Lef t or Right on D-pad of the controller.
02
02 PUT THE MODULE TO GOOD USE
Use Multicloning to make a larger building. At this stage, we don’t need too much detail and we also don’t need to worr y about the Thermometer, which measures readings such as graphic s usage, sound per formance and numbers of objec ts in the scene.
For the scene we’re going for, the main focus is the feeling of being in New York, standing beneath towering sk yscrapers, and looking up to a hotel room window where the archaeologist in the stor y comes to an untimely demise. Here, I’ve combined the window modules with a tall wall element to make it look like a building facade.