Camera College
The complete guide to modern photography
NEW TUTORIAL SERIES
With a monthly photo challenge

Marcus Hawkins
Photographer and writer Marcus is a former editor of Digital Camera.
Changing the camera angle, shifting the front raspberry and adding icing sugar takes this shot from a snap to a sweet sugary delight…
Before
After
Get started with food photography
The world is not short of food pictures – but there is always room for better ones. Tuck in to some suggestions for taking your photos to the next level
Food photography is one of the most enjoyable types of ‘home studio’ shoots you can do, as you get to eat the subject afterwards. It doesn’t require a great deal in the way of equipment, either: there’s a lot you can do with a standard kit lens and natural light, and you can really take your time to arrange your savoury or sweet still-life into the ‘perfect’ composition.
That’s not to say that food photography is a piece of cake. After all, there’s a reason why there are professional photographers and stylists who specialise in this area. Getting the best results takes time and know-how, but we all have to start somewhere.
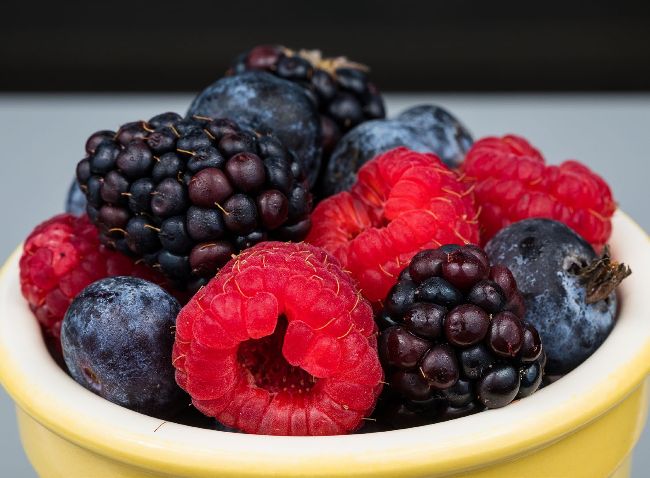
In some respects, food photography is similar to the garden macro photography we looked at last issue: sourcing the best specimen, finding a complementary background, and using depth of field creatively to make the best feature stand out. If you’re bitten by the close-up bug, a macro lens is going to be a worthy investment: it’ll allow you to focus close enough to capture frame-filling shots of delicious details as well as finished plates of food and table arrangements. A tripod is a useful accessory to have as well, as you may end up working in relatively low light levels if you’re shooting indoors. Supporting the camera gives you more freedom when it comes to choosing exposure settings, as you won’t have to worry about getting blurred results.
Controlling the light
Use sheets of white and black card to change the look and feel of your shots
Shooting near a window allows you to make the most of natural light. Bright, overcast days will deliver a soft illumination that lowers contrast, and makes it easier to capture tasty details in both the shadows and highlights. If you’re working with light that’s not quite so complimentary to the subject, consider taping some tracing paper or baking parchment to the glass.
A reflector placed on the side opposite to your light source will bounce light into the shadows for more balanced results. It can be a pain to keep a circular, collapsible reflector propped up in the right position, though. I tend to grab the nearest sheet of white card or paper – or even an envelope – then simply fold it in half and stand it in place. If you want to add more contrast and definition, use something black instead.
Crumpled kitchen foil makes for a brighter, crisper look that can suit fruit and other subjects that you want to add a feeling of freshness to.
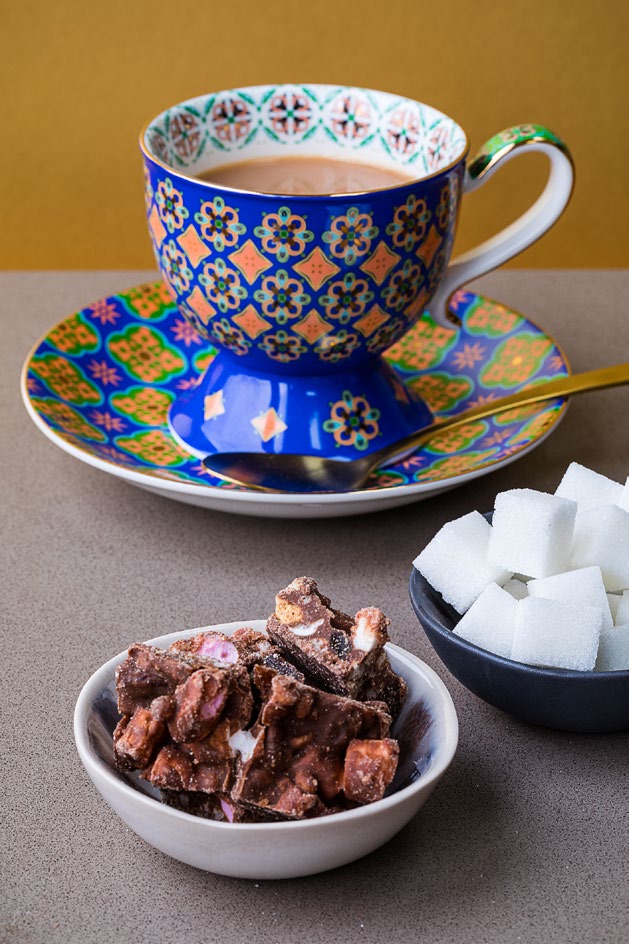
The lighting isn’t offensive, but the shadows in the foreground are a bit heavy, and the image lacks ‘pop’.
White reflector
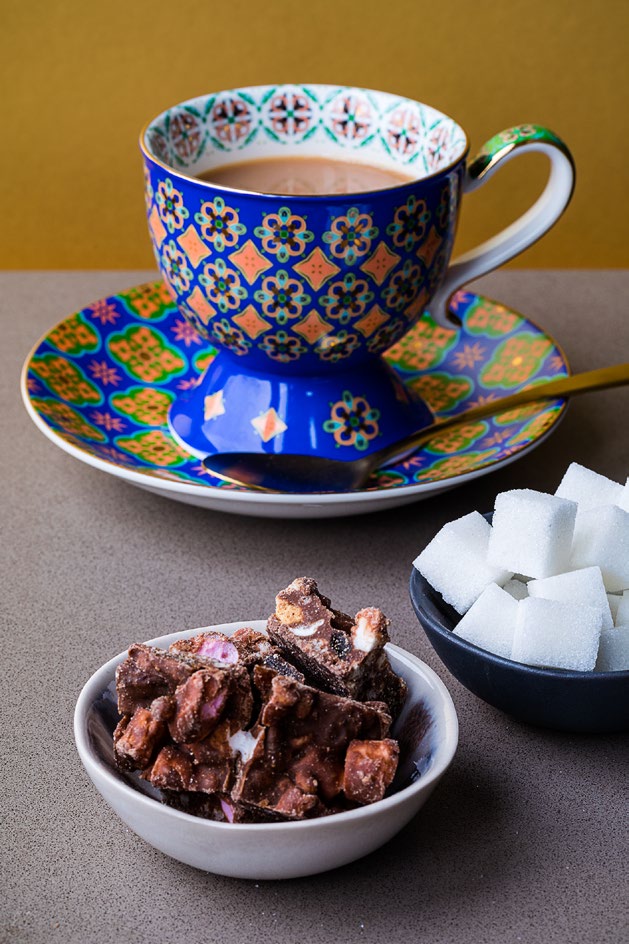
Black card, held on the right of this shot, adds more contrast. Notice how the sugar cubes are more defined.
Black reflector
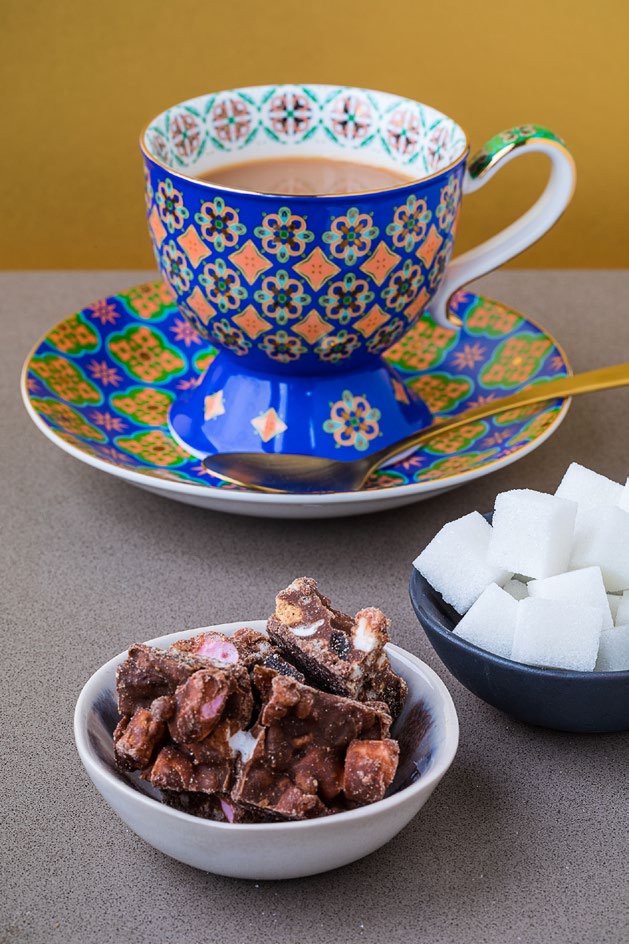
Holding a sheet of white card in the same place lifts the shadows and colour, especially on the cup and spoon.
No reflector