Create stop-motion animation with your Pi
Les Pounder shows us how to film the latest animated blockbuster using the humble Raspberry Pi, a LEGO model and a bit of imagination…
Les Pounder
OUR EXPERT
Les Pounder is an Associate Editor at Tom’s Hardware and a freelance Creative Technologist. He blogs about his discoveries at bigl.es”
YOU NEED
> Raspberry Pi 4 or 3B+
> Raspberry Pi Camera
> Raspbian
> A breadboard
> 2x Female to male wires
> 1x Push button (Momentary switch)
> Code: https://github.com/lesp/LXF264Stop-Motion/archive/master.zip
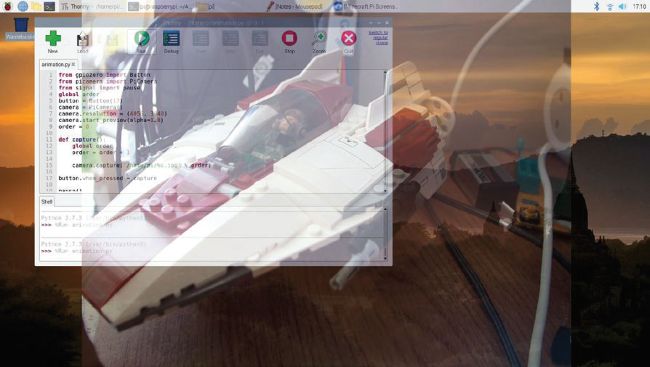
Using a semi transparent preview window, we can frame our shot and watch out for any errors. To take a shot we press the push button and capture a frame of animation.
Wallace and Gromit, Morph, the evil skeletons created by Ray Harryhausen… these are all famous examples of an animation technique called stop-motion, which uses individual images posed by an animator so that when run as a sequence, the subject appears to move. Traditionally this takes many hours or days of painstaking work. But using the power of the Raspberry Pi and its camera, we can make our own movie studio. In this tutorial we shall make a short animation using a LEGO model, all filmed using Python and the Raspberry Pi.
The button that triggers our camera is a push button inserted into a breadboard. This is then connected to GPIO pin 17, and GND. See the diagram in the download for this project for connection details (see also right).