NGINX
Access services with Nginx reverse proxy
Nick Peers discovers how to open your network services to the internet with this user-friendly implementation of Nginx.
Credit: http://nginx.org
OUR EXPERT
Nick Peers Is obsessed with self-hosting. From Bitwarden and Jellyfin to Nextcloud and MotionEye, all his services are so much easier to configure for remote access with Nginx Proxy Manager. He is the life of the party, too!
If you’re looking for a way to access self-hosted services from outside your home, you have two basic choices. For maximum security, you’d set up a VPN tunnel that you’d need to dial into every time you wanted access, but if you’d like a simpler option that’s still secure, and gives others access, you want a reverse proxy.
One of the best-known tools for the
job is Nginx (https://nginx.org), but it’s
not the most user-friendly, even when
wrapped up in deployment-friendly
containers like Linuxserver’s Swag. If the
idea of messing around with separate
config files for each service you want
to open up sounds too much like hard
work, you’ll love Nginx Proxy Manager. It enables you to
set up, view and administer all your connections via a
pleasingly easy-to-use web front-end.
Like Swag, Nginix Proxy Manager is distributed as a
Docker container. We’re assuming you have Docker set
up and configured, and have some knowledge of how it works. Nginx Proxy Manager can be installed on any
machine on your network, but we’re assuming you’ll
want it running 24-7, so you’ll want it on your dedicated
server where it’s likely most other shared services are
also running, many of which may be running in Docker
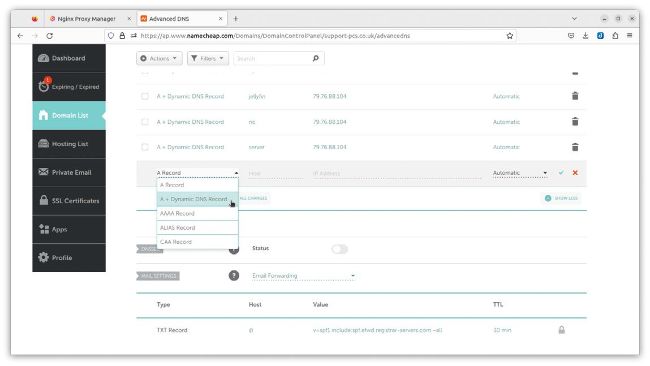
Creating subdomains for each of your services makes them easier to configure for config files for each service you want remote access using Nginx Proxy Manager.
Nginx Proxy Manager can redirect traffic anywhere on your network, but if you want to direct traffic to other Docker containers, they must all be on the same (custom) bridge network as Nginx Proxy Manager. If you’ve not yet set up this shared bridge, it can be done with a single Docker command, substituting sharednet with your choice of shared network name: $ docker network create shared-net
You need to then connect your existing Docker containers to this network – if you’re administering them through the Portainer web interface, this is simple enough. Navigate to the container’s details page, scroll down to Connected Networks, where you can select your new network and click Join Network.
If you’re managing Docker from the command line, you need to stop and remove each container in turn, then insert the following line into the setup script you use to recreate it:
--net=bridge-for-all-seasons \