BUILDING SIMPLICITY
LENGTH OF TIME: 1-2HOURS LEVEL OF DIFFICULTY: EASY
A LONG TIME AGO, back in Maximum PC’s earlier days, PC builds were a lot more complex than they are today. The avenues that you could go down and the things you could do were more intricate, far more varied, and far more difficult.
There’s almost a weird homogenization going on right now, mixed with no small amount of refinement. As this particular hobby space has grown from a relatively small community to the mammoth gargantuan thing that it has become in recent years, it has lost some of that charm and that complexity as it’s done so.
Simply put, it’s all about money. Not in a negative way; more people got into PC gaming; PC gaming blossomed; journalism, media, influencers, and companies all followed suit, and with more interest came more investment and easier access to information and expertise. That has led to modern-day products being so well built and thought-out that it’s incredibly easy to build your first PC compared to, say, 2015, 2010, and certainly the early 2000s. It’s not comparable, but similarly, cases and components follow rigid guidelines and structures, market trends, and categories. Finding a challenge or hardware that truly breaks the mold has become increasingly difficult.
This isn’t us lamenting remorsefully how “things were better in the olden days.” Not at all. Our PCs look radically different, and perform far more complex tasks at far higher levels than they ever have done, but when everything is good, when it’s easy to set up and build a beautiful showcase PC on a budget, then well, it loses its sheen a touch.
Still, today, we’re happy to report that this build is exactly that. If you’re smart with your component picks, and decide that the Hyte Y40 is for you, what you’re left with is a super-easy build process that’ll leave you with a seriously clean-looking system, with very minimal outlay.
AND IT ALL STARTS WITH…
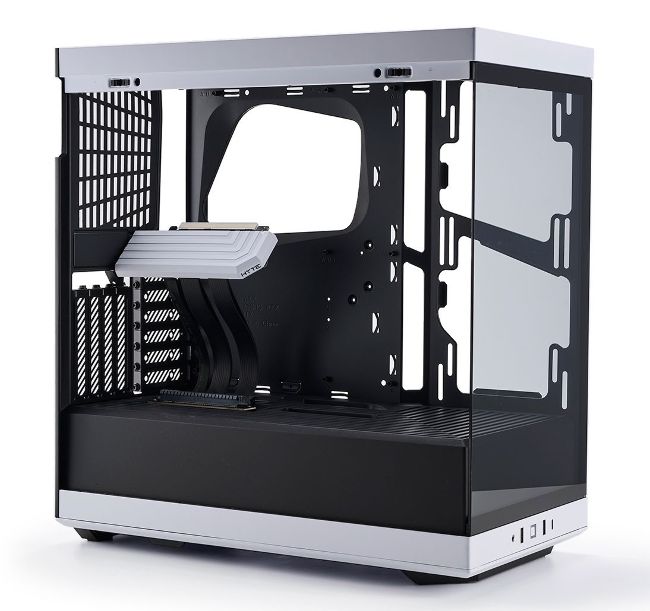
The chassis teardown. Step one (IMAGE 1) —you know it, you got it, and you love to see it. It’s our most repeated step one in these builds, and with good reason. All good PC builds start with an analytical thought process. It begins with you sitting back and thinking about your parts list, what you want to put in your case, and where you want to place things.
Then, when your case turns up and you’ve got all the hardware ready to go, the next step is figuring out how that all fits together in real life. You could sit there for hours carefully building out individual 3D models of components in CAD programs beforehand, or alternatively, save yourself a lot of boring work and get stuck in physically instead.
Stripping back a chassis not only protects the panels and reduces the overall weight of the thing while you build in it, it’ll also give you unfettered access to the interior and allow you to visualize what’s going where, how you’re going to place things, and what clearances you’ll need to think about.
For this build, the panel removal is simple: rear panel off, side window off, roof popped off, dust filters out. After that, we decided to be a bit proactive, and not only remove the 120mm stock fan in the rear of the chassis, but also detach the PCIe riser from its mounting location. We’re not removing it entirely, as it’s a bit of a pain to secure back down to the top of the PSU cover, but instead, we’re going to carefully move the motherboard around it, being sure not to scratch anything.