TUTORIALS Picamzero
Capture images and video with Picamzero
CAMERA
Les Pounder rarely smiles for the camera, but by using Picamzero we may have just turned that frown upside down…
OUR EXPERT
Les Pounder
is associate editor at Tom’s Hardware and a freelance maker for hire. He blogs about his adventures and projects at http://bigl.es.
YOU NEED
A Pi 3,4 or 5
Pi Camera 1 or 2 (not 3)
PIR sensor
3x F2F jumper wires
Code: https://bit.ly/ lxf324code
The older Raspberry Pi Cameras are ideal for Picamzero because they are cheap and plentiful – just the thing for educational users.
Using the Raspberry Pi camera isn’t too difficult, but many of us are experienced coders. What if we were new to coding and to the Raspberry Pi camera, or perhaps a child in school? Could we handle rpicam apps and Picamera2? Chances are we couldn’t, so Raspberry Pi has released Picamzero (https://bit.ly/ lxf324cam), a simple Python module that follows GPIO Zero, and GUI Zero. Picamzero offers an easier-to-use interface that may not have all of the features of the other modules, but it has enough to get the job done.
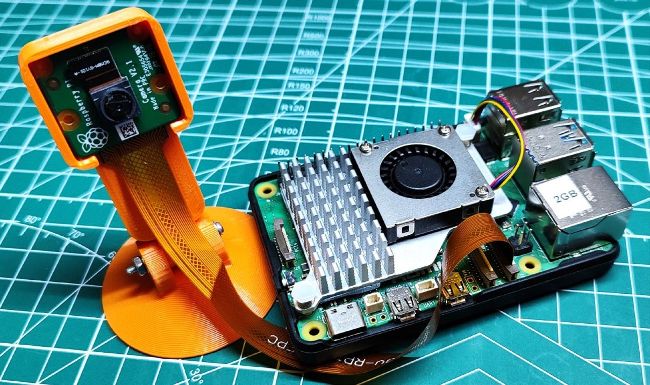
Set up the Pi Camera
Picamzero does not have any means to autofocus the camera, so it can work with the Raspberry Pi Camera 3, but you can’t change the focus. Use a fixed-focus model (Cam 1 or Cam 2) instead. The Raspberry Pi Camera connects to the CSI (Camera) port on the older models of Pi, for the Pi 5 it connects to CAM0 and requires a different cable. With the Pi powered off, carefully unlock the plastic guard on the Camera port and connect the cable with the teeth facing the Ethernet/USB ports on the Pi. Then lock the plastic guard to grip the cable. The camera end of the cable should be connected, if not, unlock the guard, insert the cable so the teeth of the cable match the teeth of the connector. Then lock the cable in place. Connect your peripherals and power up the Pi to the desktop. Before we run any Python code, open a terminal and run this command to check that the camera is working: