TUTORIALS Create a distro image
Mastering the smallest Linux desktop distro
POKY LINUX
Poky Linux is a great DIY Linux distro builder for embedded systems. Find out how Alexander Tolstoy uses it to prep an image for a desktop setup.
Credit: www.yoctoproject.org
OUR EXPERT
Alexander Tolstoy is a system administrator and DevOps engineer who enjoys exploring open source software.
QUICK TIP
Delete files in the deploy/ images directory with care. You need to know which package generates the deploy target, because an image may depend on the output files generated by another image. Keep your test sandbox safe!
The general sequence of baking a standard Poky Linux image is pretty straightforward – see Tam Hanna’s tutorial in LXF251. In short, you start by preparing your rhost system for building by installing development packages such as gawk, texinfo and diffstat. Then grab the Poky code from the Yoctoproject Git repository, initialise the build environment with the bundled script, and start baking ( $ bitbake ).
This last part is very resource intensive. You’ll need to set aside several hours, during which time your host system will be bogged down by Bitbake, and you’ll also need to make sure you have at least 70GB of free disk space, otherwise there won’t be enough room for Bitbake to do its job. All the extra software parts added on top of the minimal image also require gigabytes of free disk space, so don’t cut this corner.
These are just the minimum requirements for getting a tiny bootable Linux distribution up and running, which occupies just tens of megabytes on its own. On the other hand, most processes in Poky are well automated and therefore introduce far fewer difficulties than, say, the Linux From Scratch (www.linuxfromscratch.org) build routine.
Yocto on your desktop
While Yocto is primarily aimed at embedded systems, we’ll be looking at desktop usage. The idea is to access the benefits of Poky and bring it closer to a standard desktop workstation. As such, we can ignore everything related to board support packages (BSP), which are designed for device-specific builds (such as those for RaspberryPi), and concentrate on the generic x86-64 build. It’s this one that we can run on a regular PC.
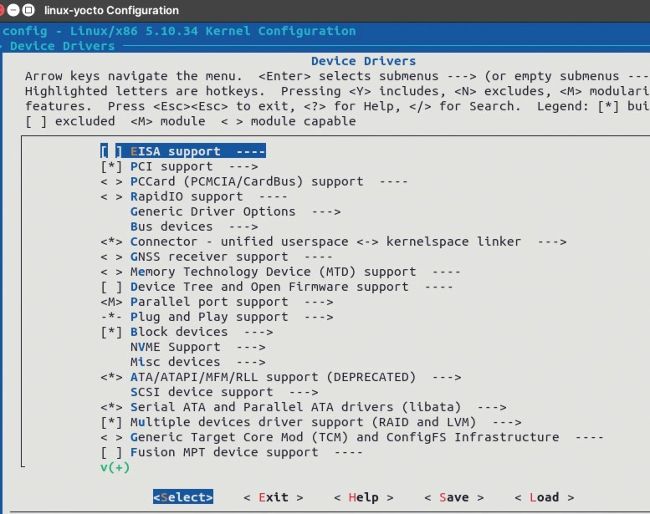
Running the build on a bare-metal system makes you’ll need to tweak the Linux kernel configuration. This handy menu will help.
The difference between a tiny standard image suggested by Bitbake (for example, core-image-minimal) and our goal is that the latter needs a lot of extra software pieces to be manually added in order to produce something viable. To be more specific, these additions include extra drivers in kernel for better realworld hardware support, middleware insertions for better experience (OpenSSH, NetworkManager and PulseAudio, for example), a basic graphical environment together with any extra applications you need. We’ll start our journey by obtaining the essential part of the Poky codebase.