HOW TO WORK WITH PLASTER BUILDING KITS
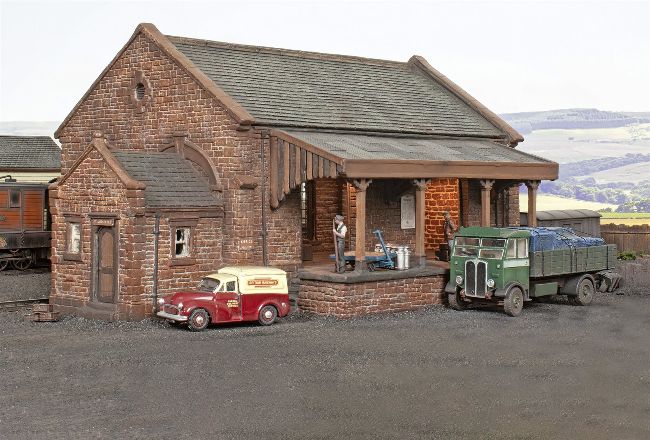
George Dent explains how to get the best from plaster-cast buildings, offering assembly and repair tips, while also improving the interior of a traditional goods shed.
PHOTOGRAPHY: GEORGE DENT
With the growth of 3D-printing, laser-cutting and the expanding ranges of ready-to-plant resin buildings making life easier for railway modellers in recent years, there’s still something extremely satisfying about working with more traditional kits and materials.
Having worked on a couple of Townstreet Models plaster-cast building kits recently, I was reminded of youthful layout projects, employing the Linka plaster casting kits (anyone remember them?). Many a Sunday morning would be spent by the kitchen sink, surrounded by white dust, as I popped out endless freshly cast brick and stone sections for all manner of structures I’d been planning in my school exercise books, as a welcome distraction from algebra.
Modelling with plaster is a timeless process, and it can still produce superb results. Few manufacturers have matched the quality of Townstreet Models kits over the years, with proprietor Pat Lockley still producing a charming array of structures from his base in Cumbria.
Possessing a texture that naturally resembles stone and brick, plaster kits can look extremely realistic once painted and weathered – far more so than plastic or resin. They’re also easy to build, with few tools required, and can be bonded securely with regular PVA-type glues.
As demonstrated here, they can also be repaired and enhanced without too much effort.
Top tool: pointed bradawl
This cheap tool was found in a local store and features a sharp, pointed tip that’s ideal for scribing mortar courses into a plaster surface. Similar tools are freely available from hardware stores.
STEP BY STEP ASSEMBLE A PLASTER BUILDING KIT