MASTERCLASS
MAKE AMAZING DOCUMENTS
Create top–quality documents with Apple’s brilliant iWork apps: Pages, Numbers, and Keynote
WRITTEN BY IAN OSBORNE

Image rights: Apple Inc.
Apple’s productivity
suite
has come a long way.
Originally sold as a collection called iWork, the three apps — aword processor called Pages, the Numbers spreadsheet application, and Keynote for presentations — are now available separately, and they’re all free.
The iWork apps are built with user– friendliness in mind, but not at the cost of features. Pages, Numbers and Keynote are likely to offer everything you need, and right at your fingertips. You can learn the basics of each app in about half an hour, and expert features are within easy reach too. As well as using the iWork apps on your Mac, iPad and iPhone, you can also log on to the iCloud website (iCloud.com) with your Apple account and access web–based versions of the apps, even picking up where you left off with a document you saved earlier.
In this guide, we show you how to get to grips with Pages, Numbers and Keynote. Assuming no prior knowledge, we teach you how to create your first document. Taking things further, we also bring you a selection of pro tips to help you get even more from your Apple productivity apps. So what are you waiting for? Let’s see what the suite can do.
Pages: Apple’s word processor
Make awesome documents, flyers and more
Pages offers a comprehensive set of features. You can use it to create stunning documents containing charts, pictures, shapes, tables, and even videos as well as text. You can flow text around objects for that professional look, and there’s a huge range of templates to choose from.
1 Use templates
When you open a new document from the File menu or by pressing Cmd+N, you’re offered a choice of templates. If you want to proceed without using a template, choose one of the "blank" options. It’s a good idea to familiarize yourself with the templates. Starting with one and changing its text and graphics is much easier than starting from scratch, and playing around with the templates helps introduce you to what the app can do.
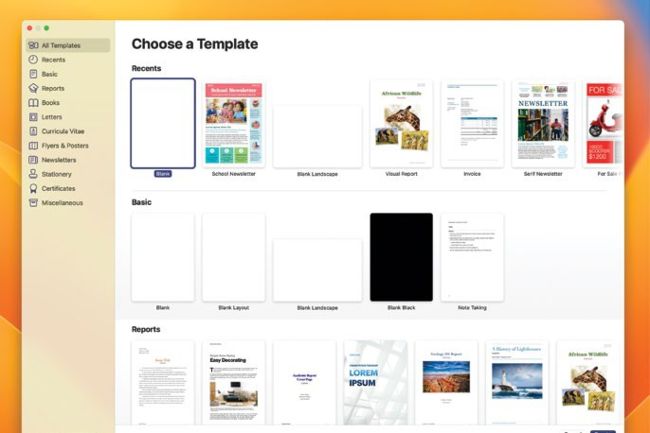
Pages has a wide range of templates, for a variety of different types of document.
2 Change the fonts
In the Pages right–hand sidebar, click the Format button in the top–right section of the toolbar for the text tools, then click the Style tab. Use this to style your text. The Font section uses pull–down menus to change the font, choose from variations on the font (usually Regular by default), and the arrows let you change the point size. Or double–click on the window showing the point size and type it in.
3 Text color
In the Style tab, to change the text color, highlight the text you want to change, click the box marked Text Color and choose a new one. Alternatively, you can pick a new color first, without highlighting text, and type in that color. Click the color wheel for more options. Select Text Color and you can choose colors for gradient and image fills too.
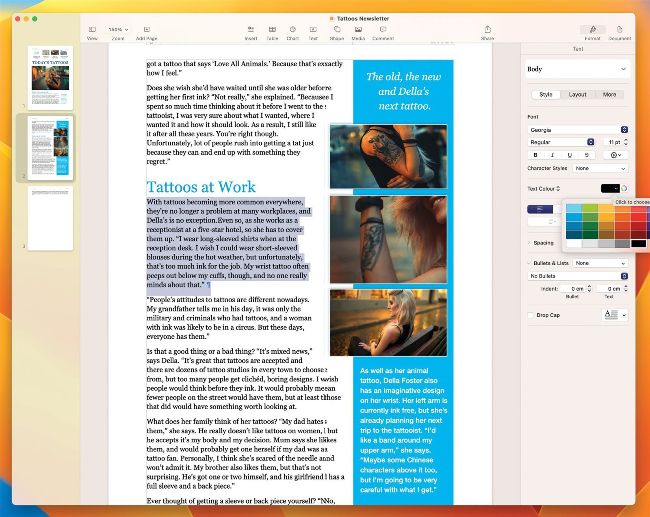
In the Style tab, you can change the color, size, font, and justification of your text. You can also make lists, add drop caps, and more.
HOW TO Use the Document sidebar
1 Set size and print
First of all, click the Document icon on the right–hand side of the toolbar. This opens the Document sidebar. If you want to print the document, use the Printer & Paper Size pull–down menus to set the page size and choose your printer.
2 Sidebar options
You can change between portrait and landscape page orientation, and set header and footer margins. You can also select Facing Pages to set up two–page spreads with the option of using different margins, headers and footers per page.
3 Mail Merge
Use Add Merge Field to add details such as a name, address and more, which is drawn from a database (your Contacts app by default). Click the Merge button (top of the sidebar) to choose a database, then print the merged document.
4 Justification
Justification refers to whether the text is aligned left, right, centrally, or both left and right. The four buttons below the Text Color section illustrate this — click one to set the text that way. Also in this section, you can increase or decrease the indent to make the margins larger or smaller.
5 More tweaks
Spacing sets the space between lines. Click the chevron in front of the Spacing listing for more options. Turn highlighted text into a list with Bullets & Lists. Again, click the chevron for more options. Click the Drop Cap checkbox to add a dropped capital, which you can then modify to suit your needs.
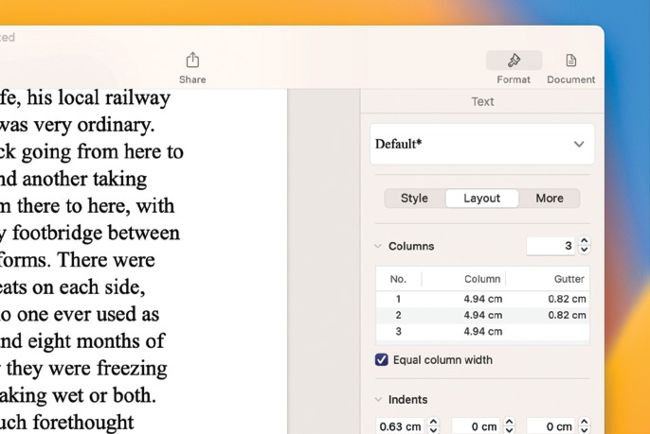
Under the Layout tab’s Columns option, you can set a number of columns, decide how wide they are, and set a gutter width.
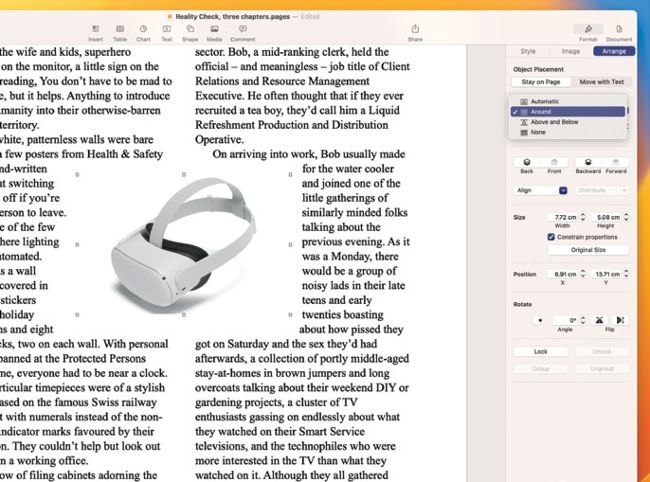
Text can be wrapped around an object by using the Format sidebar, and the Text Wrap pull–down menu.
Image rights: Apple Inc.
6 The Layout tab
Also in the sidebar, there’s the Layout tab, which is also for free–flowing text. Your layout options include setting columns. You can choose how many columns of text there are, and customize their settings. You can also set paragraph indents, set up tab options, use borders on selected text, set which edges of the selected text they’re applied to, and more.