RTX 4080
GAMING PAIRED WITH ZEN 4 BRAIN POWER
LENGTH OF TIME: 2-3 HOURS
LEVEL OF DIFFICULTY: EASY
1 TEAR DOWN
IT’S PRACTICALLY become a tradition at Maximum PC that we start our builds by stripping our chassis down to the bare bones, so no reason to go changing things. The Phanteks P400A isn’t too complicated, so tearing it down was a breeze. To remove the front panel, grip underneath the bottom with one hand while holding the case down with the other, then pull from the bottom to pop it off. The main glass window is held on with four thumbscrews, and to remove this we always recommend laying the case down on its back, given we’ve had close calls with glass panels slipping. The back panel has two captive thumbscrews, and once these are loosened, you can simply slide the panel out to remove it.
As you can see, this leaves us with a bare structure to work within, which is a good time to start thinking about potential cable management. Also, we have positioned both of the original case fans to be exhaust fans, one at the back and one at the top. These are held in by four short case screws.
2 TOTALLY NOT RAD
SO THIS IS NZXT’s Z73 RGB AIO, and it would have certainly spiced up the aesthetic of this build, but in this world, you don’t always get what you want. We’ll reveal why we didn’t end up using this shortly, but just to run through what we were going for—we positioned our radiator on the outside with the three RGB fans on the inside. As these were going to be intake fans, we needed to make sure the faces of the fans were facing outwards. One of our favorite ways to remember which way round to position your fans is with the phrase “faces suck”. These fans secure onto the radiator with the long screws included in the NZXT kit and with the radiator mount in between the both of them. We also made sure to position the cables facing the back panel so they didn’t create a mess. All of these fans are daisychained together too, with RGB in/out cables and another cable that comes from the primary top fan which connects to the to the pump later on. As we say, we didn’t end up using this for technical reasons though, sadly.
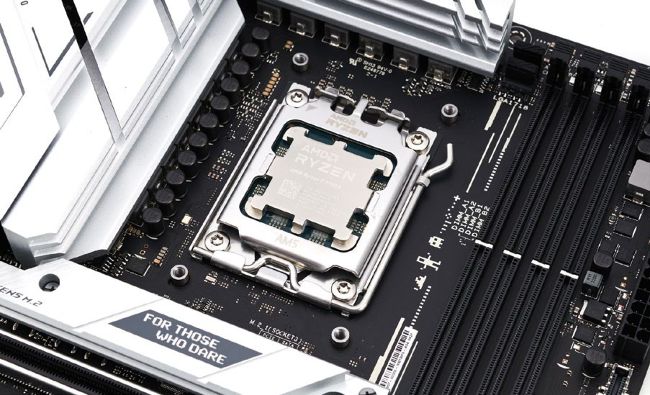
3 ZEN 4, ENTER
AIO ASIDE, WE can focus on getting the brain of our build, our tasty new AMD Ryzen 7 7700X, into our motherboard. To prepare the motherboard, we place it on top of the original box to keep it steady. Then, we open up the AM5 socket by pushing slowly down on the retention arm and easing it outwards to release the tension. Next, lift it up and the bracket will open up. To align the CPU to the correct position, make sure the arrows on the board and the CPU are together.