HOW TO
STEP-BY-STEP GUIDES TO IMPROVING YOUR PC
TIP OF THE MONTH
UTILIZING TASK MANAGER
If your PC is feeling sluggish or you just want to monitor its live performance, then Task Manager should be your best friend. To launch quickly, press Ctrl+Shift+Esc. Inside the app, go to options, and select ‘Always on top’ to ensure it overlays any open application. This means that if your game crashes, you can open this up, and end the task from here.
MAKE – USE – CREATE
62
Set up a self-hosted surveillance system
66
Keep folders in sync with Syncthing
70
The best way to fix a broken USB stick
SAM LEWIS
STAFF WRITER
HANDHELD HEAVEN
With the release of the ASUS ROG Ally, the popularity of the Nintendo Switch, and handhelds coming out of every nook and cranny, it’s no surprise that they’ve caught my interest. I come from console gaming beginnings, and have always enjoyed being able to take a slice of that kind of gaming experience on the go with a handheld device.
The Nintendo DS was the reason I first got into gaming, and while I was digging around at home, I found my old model which thankfully still had some battery life! I jumped straight on Super Mario 64 DS, possibly my favorite game of all time. For me, it was my first open-world title, and one of the first games that fully immersed me. That’s the whole point of a good game, right?
As technology advanced and consoles got better and better, the progression between the two was always more prevalent in consoles. I had always wanted an exact console/PC experience on the go, and it’s now, more than ever, a possibility. Since the Steam Deck’s release, taking aspects of the Switch and combining it with some PC magic, gaming on the go is more accessible, and similar models are cropping up everywhere. This is great for us handheld lovers, and I’m certainly in the market to pick one up.
↘ submit your How To project idea to: editor@maximumpc.com
Set up a self-hosted surveillance system
YOU’LL NEED THIS
LINUX OR WINDOWS PC RUNNING DOCKER motionEye Docker container, at least one compatible camera
(USB attached or ONVIF/ RTSP-streaming IP camera).
1INSTALL MOTIONEYE
Eye requires Linux, and you’ll find detailed installation instructions for individual distros at https:// github.com/motionEye-project/motionEye/wiki/Installation— however, you’ll discover that it’s not currently compatible with Ubuntu 22.04 or later. The simplest and most effective way to run it is through Docker, which means you can add it to your headless Ubuntu Server NAS build from September 2022, or use it in Windows through the Windows Subsystem for Linux. Another benefit of Docker is that you can integrate motionEye into your reverse proxy, making it easy (and secure) to access your video streams when away from home.
» As per our previous guidance, the simplest way to install the motionEye Docker through your server’s web-based cockpit interface is to create a text file on your main PC into which you input the Docker commands shown in [Image A] (or simply copy, paste, and amend the Docker script shown at https://github. com/motionEye-project/motionEye/wiki/Install-In-Docker).
» You’ll then need to amend the script to suit your own needs. First, you’ll see motionEye communicates over port 8765—if for any reason port 8765 is being used by another service, alter the -p line accordingly (for example, ‘-p 8766:8765 \’ to use port 8766 instead). If you plan to access motionEye remotely, you should also add the following line to join its Docker instance to the same network as your proxy server (change ‘shared-network-name’ to the name of your shared bridge network):
SURVEILLANCE CAMERAS PLAY A KEY ROLE in your home’s security, but many home security webcams are tied to proprietary services, with expensive cloud storage plans and question marks over the security of where that footage is stored and who can see it. Thankfully, there’s a free open-source solution that puts you firmly in control of all your cameras and allows you to store your footage safely at home. The tool in question is motionEye, and it works with a wide range of cameras, from USB-attached webcams to a broad selection of network cameras that support either ONVIF or RTSP streaming protocols.
In this tutorial, we’ll show you how to set up motionEye, attach as many cameras as you need to it, then configure them to provide a home surveillance system you can rely on. You’ll discover how to configure motionEye’s motion detection capabilities, allowing you receive alerts (and view footage) whenever activity is detected in front of a camera. You also get to choose whether to keep your new surveillance system under wraps by restricting access to your local network only, or we’ll show you how to configure it in conjunction with a reverse proxy for secure remote access over the internet when you’re traveling. Read on to find out how.
–NICK PEERS
A --net=shared-network-name \
» You’ll also need to set up a configuration folder for your motionEye preferences, which will point to ‘/etc/ motionEye’ in the Docker script, and a folder to store video recordings, which will point to ‘/var/lib/motionEye’.
» If you plan to connect any locally connected webcams (ie, webcams plugged into your server via USB), then add one or more lines for each webcam like so:
--device=/dev/video0 \
--device=/dev/video1 \
» Once the script is configured, select it all and copy it to the clipboard. Now, switch to cockpit in your browser, select Terminal from the left-hand navigation pane, and press Shift + Insert to paste the Docker script into the Terminal. Hit Enter, and all being well, motionEye should start and be available within seconds. If it doesn’t, check the script carefully, then try it again.
2INITIAL SETUP
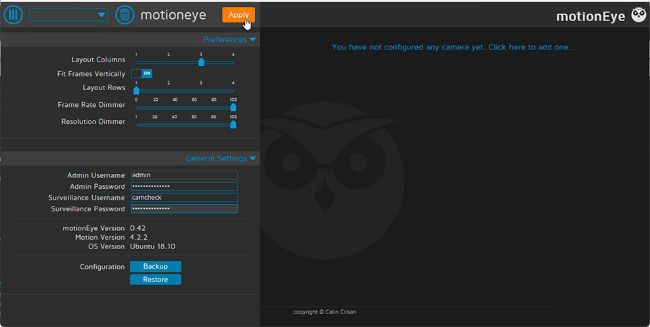
Going forward, all interaction with motionEye will be done through any web browser on your network. Start by typing the following URL into the browser:
» Substitute 192.168.x.y with your PC or server’s IP address, and 8765 if you had to change ports earlier.
© MOTIONEYE
SECURE YOUR HOME
1. ENABLE MOTION DETECTION
To start recording whenever the currently selected camera detects movement, you first need to set Recording Mode to ‘Motion Triggered’ in the Movies section.
2. MOVIE SETTINGS
Make sure ‘Movie Format’ is set to a compatible format so you can review footage and download it to your PC. In most cases, the basic ‘H.264 (.mp4)’ option is the best one.
3. FRAME CHANGE THRESHOLD
This determines how sensitive the camera is to motion detection, with 0 the most sensitive (and so liable for more false positives). Experiment with different levels between 2 and 20 to find a happy medium.
4. MOTION GAP
The setting tells motionEye how long to wait after motion has been detected before it ends recording—the default is 30 seconds.
5. IMAGE MASK
Enable this setting for a more finely tuned approach to motion detection. This enables you to block out parts of the image where motion is ignored.
6. EDIT MASK
Set Mask Type to Editable and click ‘Edit Mask’ to bring up a clickable grid overlay on top of your video feed. After you’ve done this, click inside those squares where any movement is to be ignored.