Point-and-click adventure
Moving rooms and sharing your game
ADVENTURE GAME STUDIO Credit: www.adventuregamestudio.co.uk
Nate Drake invites you to relive the glory days of point-and-click adventure games by creating your very own.
OUR EXPERT
Nate Drake is a tech journalist specialising in cybersecurity and retro games. The first thing he did when discovering Linux in 2004 was play Beneath a Steel Sky. Be vigilant.
QUICK TIP
Get the full project from Nate’s repository: https://github.com/azuregate/ pointand clicklxf
If you’ve been following this series, you now have the makings of an interactive room. I You’ve also created objects that can be picked up and used to interact with the environment. You’ve made the NPC Robbie the Robot, too, who can have conversations with the player and give your character items if you follow the correct conversation tree.
Create your next room
Having completed all available actions in this room, it’s time to configure the game to allow your character to move into another. The first step is to create a suitable background for your room. When doing this, you need to be mindful of the original resolution of your game (in this case, 320x200).
Adventure Game Studio (AGS) does support scrolling backgrounds of the kind found in many a LucasArts adventure. To do this, import a background larger than the game’s resolution. The virtual camera automatically follows your character around.
For the purposes of this guide, though, we suggest you keep things simple. You can download a 320x200 background we created using AI from https://bit.ly/ lxf313back. Once you have this or a background image you made yourself, launch AGS and click Rooms in the project tree. Select New Room.
The Create New Room wizard now appears. You’ll notice that you have the option to reset the room when a player leaves it – this can be helpful if the area contains a puzzle the character must solve in order to pass. You can also set a room number, although in this case you can leave the default value (2). If you’re planning a particularly vast adventure, remember that only room numbers below 300 save the player state. Click OK to continue.
When adding a new room, make sure you clearly define the room edges, walkable areas, objects and hotspots.
Part four!
Catch up by ordering back issues on page 60!
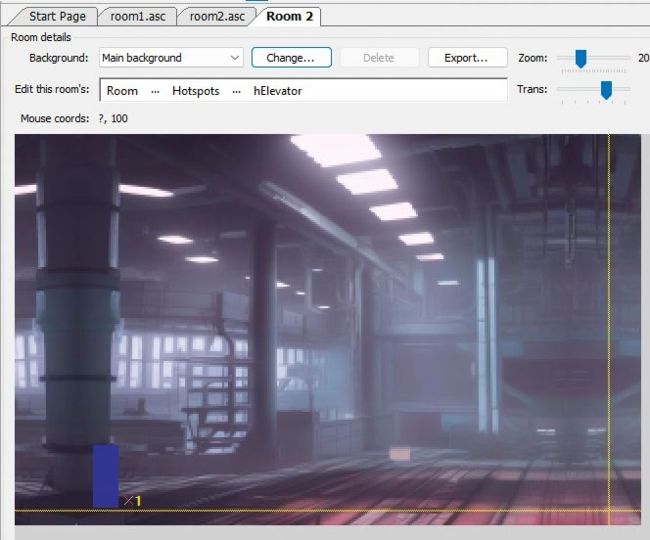
Room 2 now appears in the project tree. Click the + to expand, then choose Edit Room. You’ll see this is currently a black space. In the Room Details, click Change next to Main Background. From here you can select the background you created or downloaded earlier via File Explorer.
Defining boundaries
Use the Zoom slider to shrink the scale down to 50%. Next, we’re simply going to repeat the steps we took in the first tutorial to define this room’s edges and walkable areas.
In the room editor section, click the … next to Edit This Room’s > Room and select Edges. You can click and drag these individually. As you’re now more comfortable with the AGS interface, make sure you also take a look at the properties grid. From here, you can go through the Edges section to define the values such as LeftEdgeX manually if you wish. Use the mouse cursor along with Mouse Coords at the top-left to determine the correct values.