
CREDIT: Magictorch
How many Raspberry Pis will people be tucking into this Christmas? The latest Pi Pico is so keenly priced at just £5 that it would make an ideal stocking filler, while the Raspberry Pi 5 2GB at £46 is still a computing bargain. We should also mention the Pi Zero 2 at £15, which sits between the two feature- and price-wise.
They’re certainly alluring gadgets and open up a world of maker possibilities – the main problem is finding inspiration for what to do with a fresh Pi. So, to herald in the new year, we’re here to help new Pi owners get up and running with their tiny wonders. We’ll start with a quick overview of the Pi range and the new peripherals the Raspberry Pi Foundation has released – some are really worth a look. We’ll get Pi Pico owners up and running with the Pi that’s ideal for embedded-type projects that probably need some soldering and electronic skills.
For owners of ‘big’ Pis old or new, we’ve got some fun projects for you to try, too – and if you’re in a huff because you don’t have a Pi, these also work on normal desktop PCs, as they’re software-based, from cracking passwords to creating a dark website running in your own home. So, Pi owners old or new, and – yes – PC peeps, too, let’s get making!
Know your Pis
Choosing the right Pi can save you time and money, but they’re all fun.
QUICK TIP
PCs are invited!
The straight Raspberry Pi projects we feature largely work on desktop Linux PCs – just grab a suitable distro and give them a whirl!
QUICK TIP
PCs are invited!
The straight Raspberry Pi projects we feature largely work on desktop Linux PCs – just grab a suitable distro and give them a whirl!
The original use for the Raspberry Pi was to provide university students with some much-needed hands-on time with real hardware and software. Little did Eben Upton realise he was releasing a monster upon the then closed, embedded world. A super-low-cost, low-powered, single-board PC that ran an open source commodity OS with no licensing attached, and boom – Raspberry Pi went from expecting to make a few thousand boards to yearly production in the millions.
It was kick-started by a community of enthusiastic makers who could see its potential. A complete PC that can fit in the palm of your hand (hand size permitting) and cost $35 – people instantly wanted in.
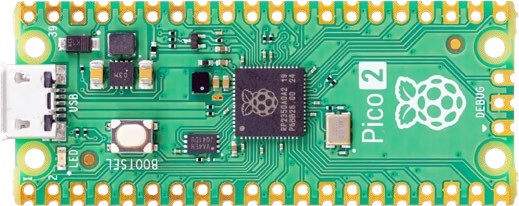
Today, the Raspberry Pi 5, Pi Pico 2 and Pi Zero 2W are three industrial-level single-board computers that can take on a range of tasks. The Pi 5, with its options of 2GB, 4GB or 8GB of memory, can almost be treated as a full-blown desktop, outside of demanding GPU applications. It’s ideal for use as a mini home server, and plenty of people put it to work running the Pi-hole firewall, or as a NAS or Home Assistant hub, or for initial development of embedded projects.
That’s where the Raspberry Pi Zero 2 can come in, if you’re looking for something with a lower overhead both on the physical size and power. Its quad-core processor is a spin of the Raspberry Pi 3 – full 64-bit but clocked slower at 1GHz, with the same VideoCore IV GPU. It means that once you’ve developed a project, you can potentially optimise it and downsize to the Pi Zero for rollout.
That brings us on to the latest Raspberry Pi Pico 2 family member. This is what you’d consider a true embedded device, designed to run a single process and react in real time. You need a PC (or Raspberry Pi) to program it with, but the upside is that its power use is a fraction of even the Pi Zero. If your main wish is to play with basic electronics, it can make far more sense to start here.
Of course, the basic Pi won’t get you very far. You also need a power supply – though many phone PSUs can deliver the Pi 5 25W required – and a USB keyboard and mouse help with input. Don’t forget an HDMI cable, and you also need a microSD card. The Pi Foundation has started selling its own rated microSD cards and we recommend those for the promised speed gains over no-name alternatives.
If you’re suitably armed with your Raspberry Pi and requisite paraphernalia, turn the page and embark on your making adventure!
CREDIT: Raspberry Pi Foundation
Get started with a Pico
Everyone has to start hacking somewhere, so let’s begin with the basics.
YOU NEED
Pi Pico/Pico W/Pico 2
Linux PC
Breadboard
An LED
A 100 Ohm resistor (brownblack-browngold)
2x M2M jumper wires
Get the code: https://bit.ly/lxf323pico
YOU NEED
Pi Pico/Pico W/Pico 2
Linux PC
Breadboard
An LED
A 100 Ohm resistor (brownblack-browngold)
2x M2M jumper wires
Get the code: https://bit.ly/lxf323pico
QUICK TIP
When soldering, always use the correct protective equipment and solder in a well ventilated room.
Soldering irons get hot really quickly, but take some time to cool, so place them on a stand and out of reach.
QUICK TIP
When soldering, always use the correct protective equipment and solder in a well ventilated room.
Soldering irons get hot really quickly, but take some time to cool, so place them on a stand and out of reach.
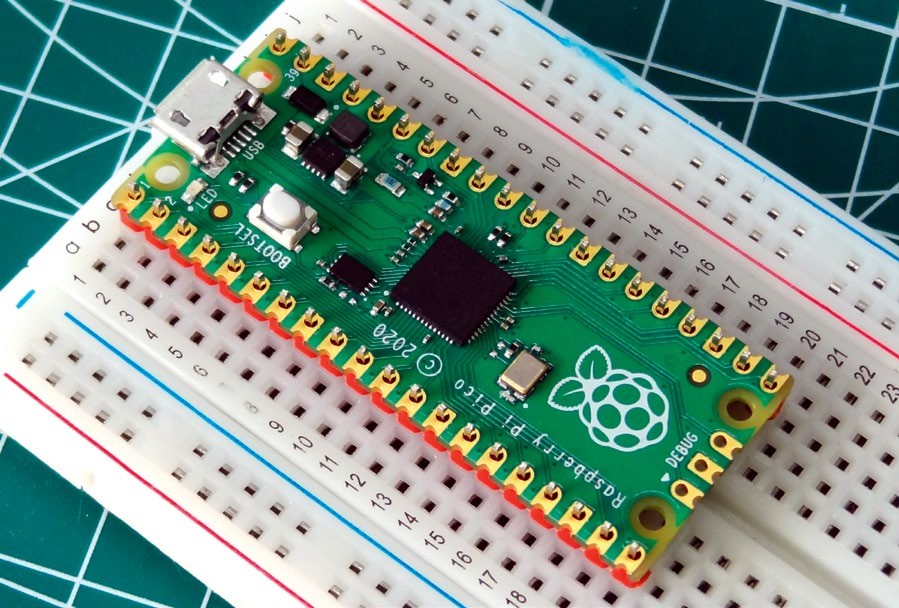
When soldering a Raspberry Pi Pico, we use an old, broken breadboard to hold every pin in place.
Happy holidays! You’ve just got a shiny new Raspberry H Pi Pico, and you don’t know what to do with it. Fear not! We’ve got your getting started guide right here. We’ll also cover the basics of becoming a maker. So, let’s get started with getting our Pico set up and ready for a project.
The Raspberry Pi Pico caused a bit of stir when it was released in 2021. In 2022, the Raspberry Pi Pico W introduced Wi-Fi and Bluetooth to the form factor. Then in 2024, the Raspberry Pi Pico 2 introduced a better spec board with The tools we use to two dual-core CPUs, including a RISC V CPU. But what they all have in common is that they are cheap and very easy to work with.
In this feature, we will get hands-on with the Raspberry Pi Pico, taking you from unwrapping your presents, to creating your first electronic circuit, coded in MicroPython.
Pi Pico ready
For this part of the process, you need a soldering iron, and over at Tom’s Hardware (https://bit.ly/lxf323irons) we have a buyer’s guide featuring all the soldering irons that we have personally tested. If you need a soldering iron, take a look over there before moving on. Our top tip: the Fnirsi HS-01 and Pinecil V2 are bargains and work really well.
Unless you pay the extra for an H model, the header pins on the Pico come unsoldered. So we need to solder the pins to the Pico. The best way to achieve this is using a spare breadboard. Cut the pins so that you have a strip for each side of the Pico. Then place the pins so that the longest part of the pin is underneath the Pico. Place the Pico and pins into the breadboard, so that the Pico sits over the ‘channel’ in the centre and the pins are not spread at a weird angle. Now solder one pin in place and then check that everything is level before soldering more pins. Repeat until all of the pins are done.

The tools we use to make; some are expensive (iFixit) but others can be found for bargain prices.
Keep the Raspberry Pi Pico in the breadboard, and connect a USB lead to your computer. While holding the BOOTSEL button on the Pico, connect the Micro USB end to your Pico. This puts your Raspberry Pi Pico/W/2 into bootloader mode, and it is waiting for firmware. Pico and Pico W users need to download the firmware from https://bit.ly/lxf323micro, while Pico 2 users need the firmware from www.micro python.org/download/RPI_PICO2/.
Download the UF2 file and then copy the file to the RPI-RP2/RP2350 drive in the file manager. The Pico updates and then disappears. This is normal.
Now open a terminal and install Thonny, a Python editor that can be used with the Raspberry Pi Pico: bash <(wget -O - https://thonny.org/installer-for-linux)
Keep the terminal open, because we need to add our user to a special user group called dialout. The dialout group has permission to work with serial devices, and we need that access to talk to the Pico.
Enter the following command, changing username to match your username: $ sudo usermod -aG dialout username Reboot your computer for the change to take effect. With the Raspberry Pi Pico connected to the computer, open Thonny and click on Tools > Options. Under the Interpreter tab, ensure that the interpreter is set for MicroPython (Raspberry Pi Pico) and that the port refers to a ‘Board in FS mode @’ followed by the device path. Click OK to connect.
Thonny’s
user interface is split into two main areas. The top area is the editor and here is where we write code. At the bottom is the Python shell, sometimes called a REPL (Read, Eval, Print, Loop). The Python shell is an interactive console and we can use it to test code, and to interact with running code.
Let’s learn how to use Thonny by building a project where we turn an LED on and off. Refer to the download (see the You Need sidebar) for a high-resolution schematic that shows exactly where the components need to go. Controlling an LED is the Hello World of electronics, and it is commonly called Blink. Our goal is simple. Wire up the circuit, and write the code that will turn the LED on and off.