PICO GPIO
Using the GPIO with MicroBlocks
Les Pounder scratches an itch and builds code for his Raspberry Pi Pico using drag-and-drop coding blocks.
OUR EXPERT
Les Pounder
is associate editor at Tom’s Hardware and a freelance maker for hire. He blogs about his adventures and projects at
http://bigl.es
.
YOU NEED
> Pi Pico
> Half- or full-size breadboard
> 220 ohm resistor (red-redbrown-gold)
> An LED
> 3x M2M jumper wires
> NeoPixel strip
> Code: https://github.com/lesp/LXF 301-Micro Blocks/archive/refs/ heads/ main.zip
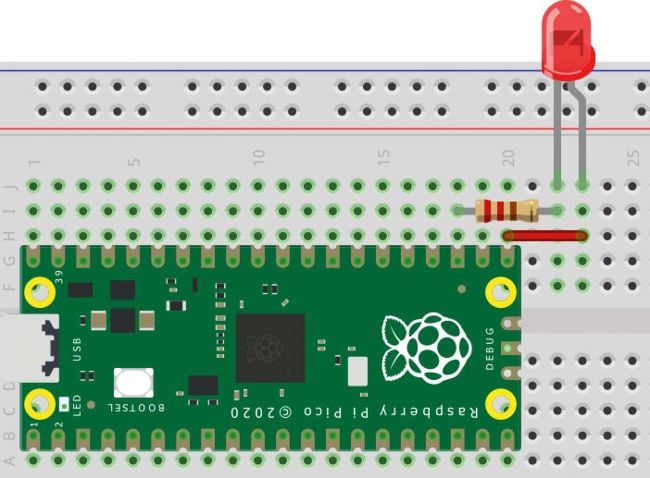
Wiring up the projects is intentionally simple. The focus of this tutorial is learning how to use MicroBlocks.
Writing code for the Raspberry Pi Pico is not just restricted to text. MicroBlocks (https://microblocks.fun) is a free language for Linux, Windows, Mac OS and Chrome devices that uses a Scratch-like interface to write code. Using blocks of code, learners can see how it works and understand the principles of coding without being scared by a wall of text. In this tutorial, we will install MicroBlocks on our Ubuntu 22.04 machine and write two projects to demonstrate how it can be used with the Pi Pico.
Preparing MicroBlocks
Installing MicroBlocks is easy, but there’s a couple of sneaky surprises along the way.
Download either the 32-bit or 64-bit version of the software from https://microblocks.fun/download (the choice depends on your chosen Linux distro). Go to the Downloads directory and double-click on the DEB install file. This triggers your distro to start the install process. Enter your root/sudo password as required. The install process doesn’t take long and it should add your user to two groups – tty and dialout – both of which are necessary to make serial connections to the Raspberry Pi Pico. Check that your user is in the correct groups by opening a terminal and using the following command (press Enter to run):