SPONSORED BY
Camera College
The complete guide to modern photography
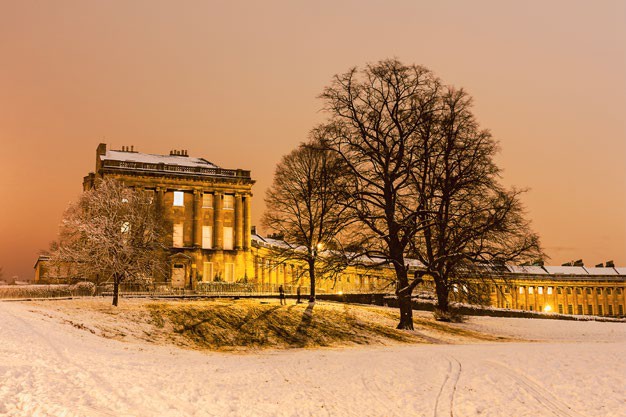
Try different white balance settings to enhance the mood. Auto (top) and
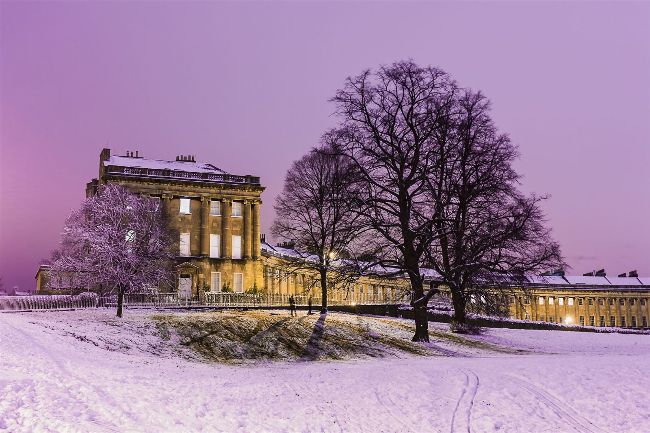
Tungsten (bottom) don’t suit this scene as well as a custom setting (right).
Marcus Hawkins
Photographer and writer Marcus is a former editor of Digital Camera
Make the most of your camera from dusk to dawn
Turn your low-light pictures into a highlight of your photography portfolio with the help of our in-depth guide to the nuts and bolts of shooting at night
■ In photography, too much light can be a frustrating thing to deal with. There’s generally more than enough light around at lunchtime on a clear summer day, for example, but it’s hard and concentrated, and generally requires a bit of intervention in order to make it work for a picture. But what about when there’s not very much light at all? How can you make the most of your camera in fading light or even in the middle of the night?
The good thing is that darkness rolls in quickly at this time of the year, so you don’t have to be up and out in the small hours. In fact, night photos don’t tend to look their best if they’re taken in the middle of the night. By shooting earlier, when there’s still some colour and brightness in the sky, you’ll be able to create more evocative shots, where the indigo-blue twilight hues provide a fitting contrast to the warm glow of streetlights, illuminated buildings and traffic trails. Pictures taken in the dead of night can look, well, pretty dead. For some types of night photography, shooting when the sky appears black may be unavoidable or necessary – if astrophotography is your aim then you’ll have to shoot when there’s a clear view of the stars. But it can be hard to capture everything in a single exposure when you’re faced with dense black areas and bright lights. Shooting when there’s less of a contrast between the subject of a picture and the surroundings makes it easier to record
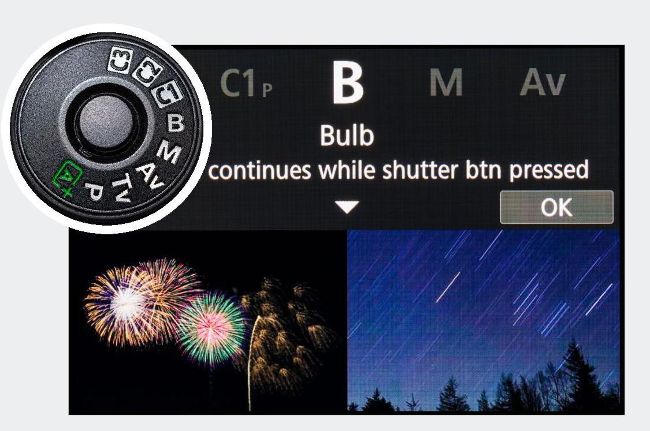
Bulb If your camera doesn’t have a ‘B’ option, choose ‘M’ and scroll beyond the ‘30 seconds’ shutter speed to access Bulb mode.
How to shoot at night
Be ready for longer exposures in low light
You can choose any of your camera’s exposure modes when you’re shooting at night, but the lack of light means that you may have to make some manual adjustments. If you’re shooting with Aperture Priority, for example, then you’ll probably have to shoot with the aperture at its maximum setting in order to let as much light into the camera as possible. Even then, you may be dealing with exposure times that run into several seconds, so you’ll need to make sure that the camera is supported well if you want sharp results. To unlock faster shutter speeds, you can increase the ISO.
Your camera will be able to automatically work out the exposure when the shutter speed is up to 30 seconds long. If the combination of aperture and ISO require a shutter speed longer than 30 seconds to record an image then you’ll need to use Bulb mode and time the exposure yourself.