ROBOT KIT
Design and build your dream Pi robot
In his latest series, Les Pounder explains how to plan, design and build your very own Raspberry Pi robot from the basics up.
Part One!
Don’t miss next issue – subscribe on page 16!
OUR
Les Pounder is associate editor at Tom’s Hardware and a freelance maker. He blogs about hacks and makes at http://bigl.es.
YOU NEED
Robot kit
Soldering iron and accessories
Flush cutters
oggles Screwdriver
A sakid, I loved robots. From Robbie the Robot and Metal Mickey to the Terminator and the robots from The Black Hole, if it had a CPU and a tendency to run rampant and threaten the destruction of the world, I was there. Now middleaged, my love of robots has never waned, but I would rather see them as companions than overlords bent on our destruction.
Robots are still awesome and over the past decade they have become easier and cheaper to create, largely thanks to the Raspberry Pi and Arduino. Building a robot is a right of passage for an aspiring maker. By building your own, you learn key maker skills: soldering, circuits and code. If you have the means and skills to do so, you can go DIY and build a fully custom robot from scratch, using laser-cut or 3D-printed parts. But if starting out, you can use one of the many kits available.
If you want a completely ready-to-go solution, Pimoroni’s Trilobot is an amazing kit. Using PCBs as the chassis, this kit integrates the Raspberry Pi 4 as a central part. It can work with ultrasonic sensors, linefollowing sensors and many others via the GPIO.
At the other end of the robotics scale are the advanced robots that use machine learning and artificial intelligence along with sensors and cameras to understand the world around them and navigate. The best examples of this are the robots from Boston Dynamics, and to a lesser extent the robot vacuum cleaners that keep our homes clean.
The focus of this new series is to create our own four-wheeled robot. Each month, we shall learn more about a specific aspect of the project, starting in this issue with the various types of robots and chassis, and building a chassis on which we will add motors, sensors, Raspberry Pi and a power supply. Later in the series, we shall learn how to give our robot vision and stream live video as we drive around. With that in mind, let’s take a look at the basic robot archetypes.
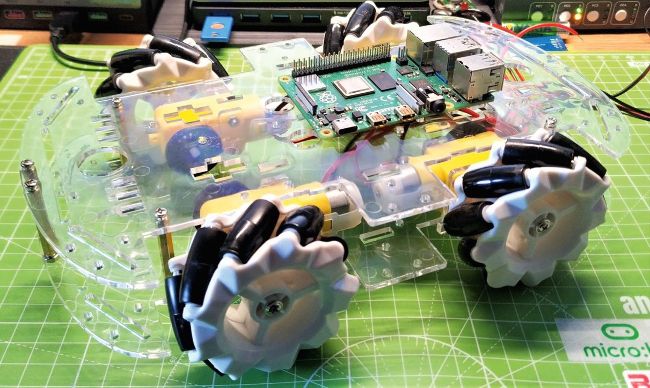
The starting point for our robotic adventure. A simple, expandable chassis that we can use as the basis of a multi-purpose robot.