PICAMERA2
Eye spy with my little Pi API…
Tam Hanna uses the new Raspberry Pi Camera API and Microsoft Azure to create a machine that can classify things.
OUR EXPERT
Tam Hanna has been using the Raspberry Pi and similar single-board computers since their initial release in 2012. Before that, he kept himself busy with general electronics design and phone programming.
WARNING
Microsoft Azure is a paidfor service. Linux Format cannot be held responsible for any costs incurred from following this tutorial. The reader is wholly responsible for account creation and subsequent service costs.
Artificial intelligence models tend to show A surprisingly large amounts of robustness against suboptimal image quality; many images that a human photographer would delete during chimping pass muster when studied from an AI model’s point of view. Due to this, we can get away with using relatively dated hardware – the main computer is a Raspberry Pi 4, while the Raspberry Pi Camera Module 2 provides vision features. For reference, the OS used was 2022-09-22-raspiosbullseye-armhf-full.img.
Each camera module is shipped with a ribbon cable for connection. Be careful not to damage the connectors, as resoldering them requires expensive equipment and is not error-proof. When done, the system should look like the photo (above).
There’s a reason why software development theorists compare large software systems to cubes of ballistic gel: the larger a system gets, the more complex its maintenance. Due to this, the deprecation of the original camera library is a slow process – however, most recent Raspberry Pi OS images come with a version of camera2 in memory. Prudence dictates that the next step involves a dry run of Apt. The following steps are based on version 0.3.8-1: $ sudo apt install -y python3-picamera2
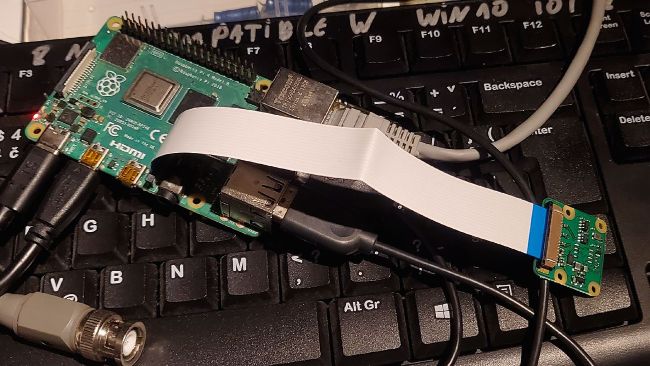
Our Raspberry Pi 4 connected up to the official Pi Camera, ready to go.
Using the camera
Authors of scientific tutorials like to illustrate the Raspberry Pi camera solely in combination with a cloud-based AI system. This is a bad strategy; while it leads to impressive results quickly, they are incomplete – the Raspberry Pi camera system makes for a powerful standalone image processing system, too. Our first example, thus, is a simple smoke test. Create a new Python file and place the following code within it: from picamera2 import Picamera2, Preview import time picam2 = Picamera2() camconf = picam2.create_preview_configuration() picam2.configure (camconf) picam2.start_preview(Preview.QTGL) picam2.start() time.sleep(10)
Our first experimental job involves the spawning of a preview window, which then shows the elements found in the camera’s field of vision. Be aware that the start() call does not block – if you remove the invocation of time.sleep() , the camera preview pops up and disappears again in an instant.