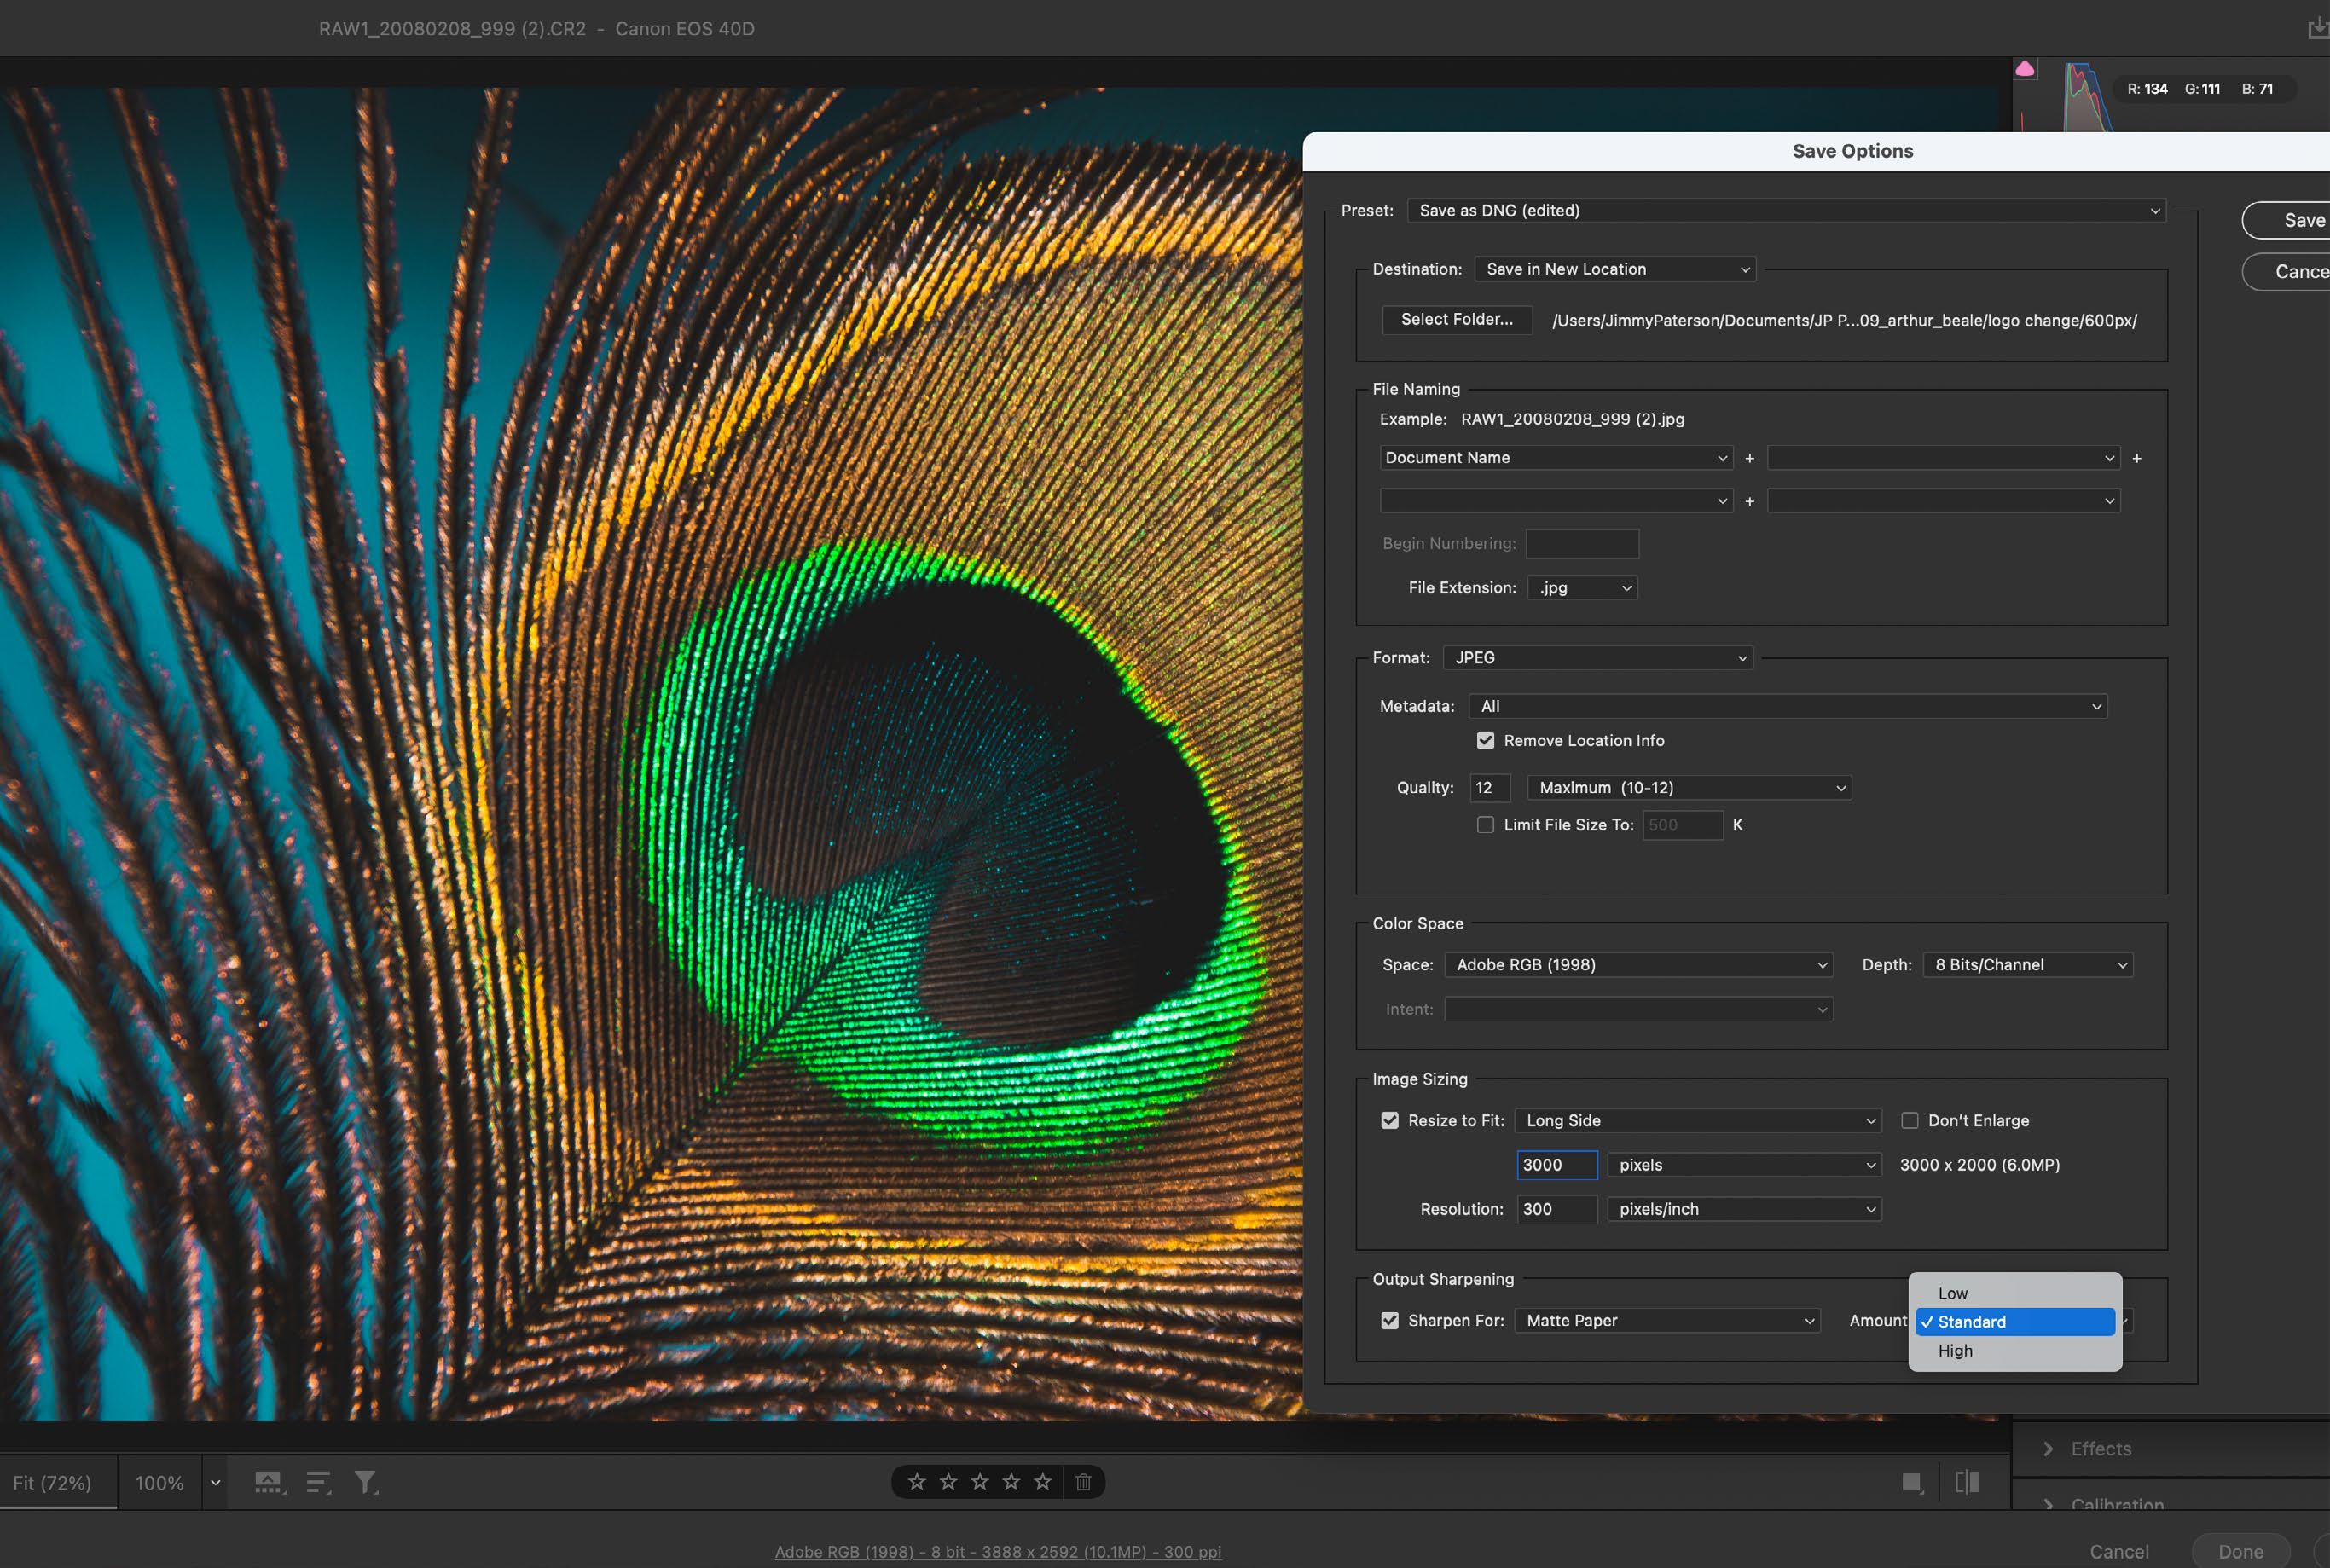
Head to the Export settings in LIghtroom or the Save Image settings in Camera Raw for output sharpening that is tailored to the image size. Choose a media type and set a strength for a finely tuned level of output sharpening.
Sharpening is tied to resolution: if we alter the resolution of an image , perhaps in order to prepare it for printing or web publication, we often need to apply sharpening too. So once we’ve resized an image for a specific output – whether it be a 10x15 inch print or a 600px web image – we need to apply output sharpening that is tailored to the specific media and resolution of the image, to ensure that the image looks nice and sharp when viewed in its end format. Usually the ideal tool for this will be Photoshop’s Unsharp Mask or Smart Sharpen. But if you want to export images directly from Camera Raw or Lightroom without having to open them into Photoshop, there’s a simple, effective output sharpening tool in the Export dialog (or in the Save Image dialog for Camera Raw).