PLAY KEYS LIKE A PRO
Always wanted to improve your keyboard dexterity but never found the time? Or looking to incorporate some piano into a track? Limber up your digits and dive in…
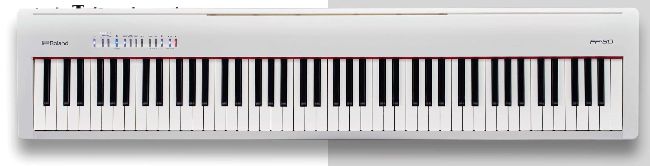
All images courtesy Roland UK unless otherwise stated
By far the most popular method of inputting note data into your DAW is - you guessed it - the MIDI keyboard. Although technology can overcome many of the hurdles faced by non-keyboard players when composing music on computers (think step sequencing, inputting notes by hand in the piano roll, using MIDI chord pads, etc.) things do speed up enormously if you can play a bit. Back in 255, our
Play Keyboards Like A Pro
cover feature approached the art of playing keyboards from a practical angle, combining a selection of exercises to strengthen your finger muscles and develop independence with practical advice on how to begin tackling typical parts in a variety of styles.
This follow-up packs in even more exercises and practice tips, structured from absolute beginner-level upwards, and is designed to provide you with the tools to develop enough finger strength and dexterity to be able to play some actual music, rather than just scales.
There’s no getting away from it - the three key words when learning any instrument are practise, practise and practise. Keyboards are no different - your fingers will only co-operate with what your brain is telling them to do if you practise regularly.
Something to bear in mind is what to actually practise on. If you practise on a piano, either digital or acoustic, with a proper, fully-weighted keyboard, it’s a bit like doing a workout with heavier weights - you’re likely to find it a bit tiring and difficult at first, but you’ll probably see results more quickly than if you practise on a regular, lightweight synth-action keyboard. Either way, the key is to start out with something comfortable so that you don’t suffer finger fatigue and get put off right at the start by how hard the keys are to actually play.
Work the exercises you’ll find over the next few pages into a regular daily practice routine and you’ll be amazed at how much your technique will improve. By the end of things you should be able to work towards playing a piano improvisation involving the use of broken chords, arpeggios, inversions and a left hand part playing octaves and fifths in the bass.
DOWNLOAD
We’ve got some classic videos for playing like a pro at filesilo.co.uk/computermusic
> Step by step
1. How to navigate the keyboard
1 The layout of black and white keys has been standard on most piano and keyboard instruments for centuries, but how do you find your way around it? With 88 keys, a full-size piano keyboard might look intimidating, but it’s really just the same group of 12 notes - or octave - repeated seven times, with a few extra thrown in at the top.
2 If we examine the keyboard, we can see that the black notes are arranged in alternating two and three-note clusters. If you zoom in on a section of the keyboard and find any cluster of two black notes, the white note immediately to its left will be a C. On an 88-note keyboard, there will be eight C-notes in total, with C8 at the very top.
3 This works anywhere on the keyboard to be able to find any C-note. The note known as middle C will, naturally, be the one in the very centre of the keyboard. If we do the same thing, but this time homing in on a cluster of three black notes instead of two, the white note immediately to the left will be the note F.
4 Counting two white notes down the keyboard from a C gets us to the note A. From there, it’s just a question of filling in the gaps to get the names of the other white notes in between. Once we get to G, we start again at A (there’s no H, except in the German system, which replaces the ‘B’ we use in the UK/US with ‘H’). We get A, B, C, D, E, F, G.
> Step by step
2. Naming the black keys
1 To name any black key, start with the white key just to the left of it, then just add a sharp sign (#) to the note name. So, for example if we start on C, the black key to the right of it will be C#, from D it’ll be D# and so on. There is no black key to the right of E, but there is one next to F, so that’s F#. Same goes for G# and A#.
2 Hang on though - if you start from the white key immediately to the right of a black key and step down the keyboard to it instead of up, you add a flat sign (b) to the name. So starting from A we’d go down to Ab, from G down to Gb, and so on. There are no black keys to the left of C or F.
3 So each black key actually has two names, as black notes can either be referred to as sharps or flats, depending on which key you’re in. These pairs of names are known as enharmonic equivalents, for example C# and Db, which are the two names for the key on the keyboard that lives between the white keys C and D.
Things to avoid when practising
Once you know the pattern, identifying notes on the keyboard becomes second nature after a bit of practise - one good exercise is to have a friend call out random note names for you to find and play. As with any learning process, though, there are a few do’s and don’ts to try and keep in mind when starting out on keyboards. These include:
Bad posture
Try not to slouch! Instead, focus on keeping your back straight, shoulders relaxed, with your arms forming a series of gentle arcs from the shoulder through the elbow to the forearm and wrist. Also, make sure your keyboard is at a sensible height - for reference, the average grand piano keyboard is set at a height of around 72cm - and that you’re not sitting too close to it.
Sticky-out fingers
It’s important to adopt the proper hand posture right from the off, so when you position your fingers on the keys to play, make sure they’re nicely curved and relaxed instead of sticking out flat - imagine resting your fingers across the top of an orange, and you’ll get an idea of the shape you’re after.
Going too fast
The old ‘don’t run before you can walk’ adage definitely applies here - many budding players try to play too quickly too soon, only to run into trouble and give up. Playing things slowly to start with can take almost superhuman patience, but it’s important to build accuracy without overwhelming your muscle memory.
Not using a metronome
Building a good sense of timing is crucial for any musician, so make time in your regime to practise playing against a regular beat, be it a traditional metronome or a preprogrammed beat or loop in your DAW. It’s fun too!
Not practising
To get into the habit of practising, try and set aside a regular slot of at least 30 minutes in your daily routine. At the same time, however, don’t forget to keep it fun - if things get boring or frustrating, take a break and come back later on.
> Step by step
3. Exercise-five-finger scale (both hands)
1 Starting with the right hand, and keeping your hand and fingers relaxed, place your right hand lightly on the keys, with the left side of your thumb on middle C and the tips of your fingers resting on the next four white keys (D, E, F, and G) to the right. From here, let’s number the fingers 1,2,3,4 and 5, with the thumb being 1, index finger 2, etc.
2 Maintaining this position, press down with just your thumb to play middle C. Keep the other fingers as still as you can, and try to avoid sticking your fingers out straight in weird directions as you play. Lift up and press down again to play the note a few more times, getting used to the idea of not moving the rest of your hand as you do so.