GIMP
Enhance your photos by stacking them
Combining multiple photos of the same scene using a stacking technique can result in some spectacular results, reveals Mike Bedford.
Credit: www.gimp.org
OUR EXPERT
Mike Bedford likes to exercise both the left-and right-hand parts of his brain, so using technology to create artistic effects is perfect!
The principle of photo stacking is to take multiple shots of the same scene and then combine them to produce a single image. As we’ll see, there are plenty of reasons you might chose to do exactly that.
You might have come across the concept of photo stacking before, because it’s the basis of high dynamic range photography, commonly referred to as HDR. As we saw in LXF257, this technique is used in scenes with very light and very dark areas because normal photography isn’t capable of recording large differences in brightness in a single shot.
Before looking at the processing, we’ll provide some advice on taking the sequence of photos – something that applies to all types of photo stacking. A key requirement is that all the shots capture the same scene. If you don’t manage that it’s not necessarily a deal-breaker, but if the individual photos don’t match up then the processing will be more involved.
For good results, you’ll need to use a tripod so your camera or phone doesn’t move between each shot. This is especially difficult to achieve with those forms of photo stacking where you need to adjust the settings between shots. The good news is that tripods don’t necessarily cost a fortune, and while a £2 spider type tripod won’t be too sturdy, proper tripods start at less than £10. For optimum results, if your camera supports one, you might also chose to use a cable release or a wireless remote control to further minimise movement.

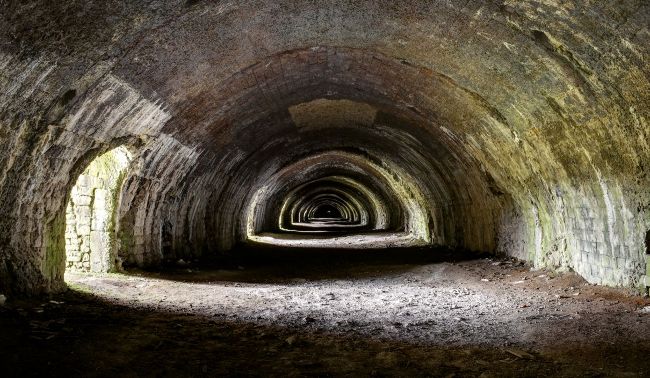
By combining three differently exposed shots of this archaeological lime kiln, a single HDR image has been created that shows details in both the light and dark areas.
Before taking a look at our first type of photo stacking, we’ll explain how to correct the registration between shots if they don’t line up correctly. Our main emphasis is a manual approach to photo stacking using layers in a photo manipulation package such as GIMP. Here you’ll be importing each image as a different layer in GIMP. With the exception of the first one, as you import each layer, make it partially transparent and move it around while zoomed in, so that it lines up with the others that are already aligned. Finally, adjust the Opacity setting back to 100 per cent. Alternatively, there are automated tools for doing this – see Automated Approaches box (page 70) – and there are GIMP plugins available to help with this stage.
Focus stacking
Our first reason for stacking photos is to achieve a good depth of field or, to use a less-technical term, to ensure that all parts of the image are in focus, irrespective of their distance from the camera.