GIMP
Get started photo editing with GIMP
Photo editing
In the first part of a new series, we’re going to get you editing like a pro but using the all-powerful GIMP and less-powerful Neil Mohr.
We don’t talk about GIMP much. That’s probably a mistake – it was used to create Tux and is W one of the most powerful open source image manipulation tools around. But in recent years, while Photoshopped remains the bastardised transitive verb people use to talk about photo manipulation, Krita (that image has been Kritted?), with its user-first approach to fundraising, community-building and featureprioritising, has taken the spotlight in FOSS circles.
The great news is that GIMP is moving towards a version 3.0 release, and the developers seem to have realised that listening to users makes them more likely to give you money for development. Long-awaited features such as a usable interface (HiDPI-aware) and CMYK support are all being delivered, largely driven by refactored code, Wayland support, moving to GTK3 and heck of a lot more besides. So, we’re getting you lot up to speed with this startling photo-editing tool via a new series. In this first part, we’ll get used to the interface, navigation tools and core editing features.
OUR EXPERT
Neil Mohr for his sins, grew up with Photoshop 2, but back then GIMP didn’t exist. Now it does and he uses it a lot.
You tool!
GIMP’s toolbox is its most important element. It gives you quick and easy access to some of the most widely used – and powerful – tools available in GIMP, without having to navigate through tiresome drop-down menus to find them. By default, it appears on the left-hand side of your screen, and that’s generally how we’ll refer to it in this guide; however, you can drag it around with your mouse and place it wherever you want – which means the tools are never far from where you need them. Selecting a tool from the toolbox is as simple as clicking on the tool’s icon. Once selected, your mouse cursor changes to reflect it.
Part One!
Don’t miss next issue, subscribe on page 16!
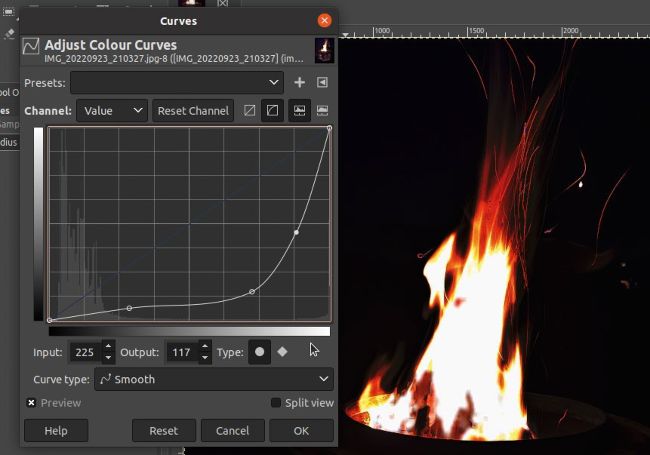
The Colours menu delivers a huge range of manipulation tools, Curves and Levels are two such classic controls.
GIMP starts in one-window mode; this is good – don’t change it. The original methodology was floating windows but you spend as long managing tool windows as working on your image. Big displays and high resolutions mean that mode is as good as dead. It can be toggled via Windows > Single-Window Mode.