WLED
Build light shows with multi-coloured LEDs
Use WLED firmware and a string of LEDs to create eye-catching light shows to display around your home, with Matthew Holder.
Credit: https://kno.wled.ge
T his month we’ll be looking at the WLED firmware and what it’s used for. We’ll be building a project that features LEDs being controlled via a web interface and home automation software. We’ll also discover ways to make the lights react to music.
This type of LED are commonly known as NeoPixels. They’re strung together and are usually multicoloured and can be addressed individually. Versions of the LEDs are available that take different input voltages and they can all be controlled in the same way. NeoPixel is the name given to this style of LEDs by Adafruit (that offers a wide- -range of models), but the same driver is used for a large number of them (WS2811/WS2812), whoever the manufacturer or supplier happens to be. Models are available with separate RGB channels, so that any colour can be made by mixing the values (think of HTML colours). Furthermore, some have a Wchannel as well, which is an LED that outputs white light.
WLED is open source firmware, which can be installed on ESP8266 and ESP32 microcontroller boards. The ESP8266 is the older board of the two and has lower processor power. The ESP8266 is powerful enough to run the firmware and a smaller number of LEDs. When considering a larger number of LEDs, it’s a good idea to spend a little extra money on an ESP32 board. When installed, configuration takes place using an integrated web interface, integration with Home Assistant, or the lights can be controlled with software so that they react to music being played on a PC.
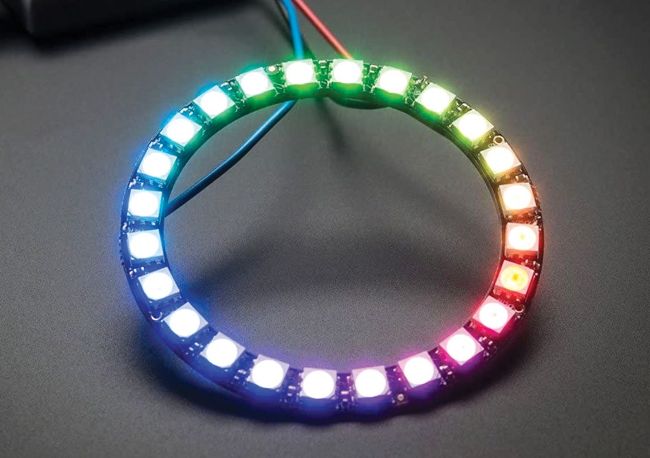
The Adafruit 24 RGB NeoPixel LED ring in action.
CREDIT: Adafruit
In this tutorial, we’ll install WLED on an ESP8266, NodeMCU board, investigate the web interface, briefly talk about the Home Assistant integration and then describe methods of enabling the lights to be reactive to music. Method one is to use an alternative version of WLED, while method two is to use another piece of software that communicates with WLED and takes over the light control.
First of all, WLED needs to be installed. This is a trivial task, if using a recent version of Google Chrome. First, plug the microcontroller board into a device running Linux. Open a terminal and enter dmesg -w . This may need to be prefixed with the sudo command to run as an elevated command. Towards the bottom of the output, there should be an entry referring to a new serial port, which will have the designation of /dev/ttyUSB0 (the USB number may very well vary).