HOW TO SCRATCHBUILD A BRIDGE
PART ONE
George Dent builds an overbridge for his ‘Lisburn Lane’ layout, using an innovative product to create a suitably rusty appearance.
EXPERT MODELLERS SHOW YOU HOW

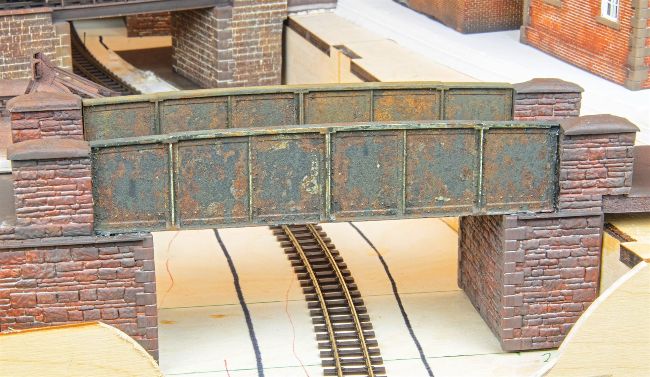
With layers of peeling paint and realistic surface rust, the completed bridge will provide a suitably gritty foreground element to this industrial scene.
PHOTOGRAPHY: GEORGE DENT
As in real life, bridges are one of the most important elements of a model railway. For much of the UK rail network, bridges crop up at regular intervals, taking trains over or under a wide range of obstacles.
Unsurprisingly, modellers have numerous off-the-shelf and kit options for over and under-bridges, especially in ‘OO’ and ‘N’. However, when faced with filling a specific space within a layout, these ‘fixed geometry’ structures don’t always fit the bill.
Thankfully, some kits lends themselves to modification, while there are also plenty of resources for scratchbuilding, such as the plastic girder spans from the Peco range.
SPAN THE GAP
On my ‘Lisburn Lane’ layout project, the main baseboard includes a ‘dropped’ section, allowing the trains to traverse a river or other such feature. Built from a custom, laser-cut plywood baseboard kit from the Tim Horn range, my original plan was to portray an idyllic stream winding along this sunken area.
Indeed, the intention was to recreate a semi-rural location but, more recently, I’ve decided to opt for a more industrial vibe, allowing me to reuse buildings from previous layouts. Also, with a general lack of enthusiasm for creating water features, I’ve now decided to lay a stretch of narrow gauge track, which should tie in with the industrial surroundings.