THE ULTIMATE
BUILDER’S GUIDE
Take a peek at how we go about building PCs, as there’s always time to learn something new
By Christian Guyton and Sam Lewis
WHETHER YOU’RE aPCbuildingveteranwhohas more machines under their belt than Origin PC, an intermediate builder who’s comfortable but has scope for more knowledge, or if you have all the gear but noidea, this guide contains all the tips and tricks to make building a PC an enjoyable experience. If you are reading this, chances are you have a keen interest in PCs, and even if this article isn’t immediately helpful, it will be at some point in the future.
Custom PCs are our true love; they aren’t necessarily cheaper, and certainly aren’t easier than a pre-built plug-and-play machine, but the advantages are significant. The sky is your limit (well, that and your wallet), but you get full control over what goes inside and how you want your PC to perform. Remember: There may be problems along the way, even if you are an old hand, so here are 38 tips to help make your builds go smoothly.
(01) Plan Ahead
Before you start getting your sledgehammer out, you need to think about what you want to use your PC for predominantly. Also, for legal reasons, please don’t use a sledgehammer or any large destructive tool for your build— many thanks. Back to what you want; you could be after a PC that is completely productivity-focused for video editing or designing, or maybe you want gaming monster that can run at ludicrous FPS and shatter all other PCs within a 50- mile radius. Even if you just want one for work and the odd bit of Netflix, it’s important to nail down what demands you want to make of your PC, as this determines what parts you need. The difference could even affect which OS you use (that’s right, we’re not just shills for Windows 10). So, make sure you research what makes your ideal PC perform to its best. Also consider where you will put your PC and how you want it to look; will it be on display? Tucked under a desk? Sitting in your living room? Remember: Planning your build always comes first.
(02) Research
The Internet is filled with useful information on PC components, hardware specs, reviews, and tutorials to help in your build. Video guides, in particular, give a great insight into how a part functions, looks, and fits inside a build. When finding out what components to get, research similar builds and you’ll eventually get an eye for what makes that system good for its intended purpose. You will likely find a common denominator and from there you can look at how to complement that component with other parts. It is also worth looking on the manufacturer’ websites and through their PDFs for installation advice, and a component compatibility check on pcpartpicker.com wouldn’t go amiss, either. It’s a great place to start virtually piecing together your PC parts. All of this is essential before diving deep into your new rig.
(03) Bare Essentials
When building a new PC, the place to start is the case; we always recommend this. Take a good look around, making sure everything is as it should be, and strip it all down. Remove any side panels, dust shields, and windows. To help with airflow and cable management, it’s best to remove any hard drive cages and additional mounting brackets if you’re not using them. This maximizes negative space, producing more room for you to keep things neat and tidy. Unfortunately, we all know that tempered glass panels are a fingerprint magnet, so be careful that you don’t smudge all over it when removing this panel. New cases usually come with a protective film over any glass parts, so wait until you’re done building to take this off.
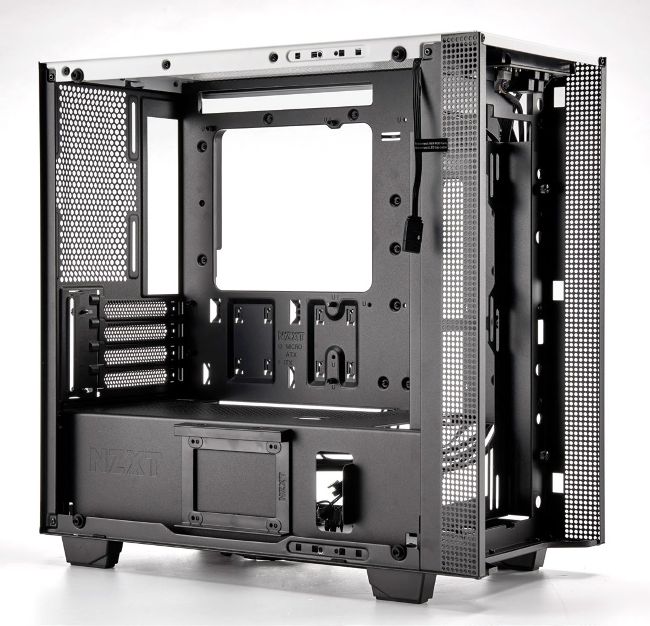
You should start any build with a bare, stripped-down case.
(04) Pick a Fan
For both rockstars and PCs, fans are essential (sorry). The bottom line is that a PC would inevitably overheat and cook if it weren’t for the intake and exhaust fans that regulate the internal temperature. There are two categories that fans fall into: bulky static pressure models and thin, many-bladed airflow fans. The former is designed for high-pressure environments, such as moving air through a thick heatsink. The latter moves air faster through the case, but with reduced force. Mounting multiple airflow fans provides good airflow to your PC, shockingly enough. Static-pressure fans, however, are vital for radiators if you choose to run with an allin-one cooler. Some fans utilize magnetic bearings to “levitate” the fan inside its casing, which prolongs the lifespan and reduces noise, but naturally comes with a larger price tag. Most modern PC case fans use ball-bearing mounts, which should still last for around 60,000 hours at 50 C.
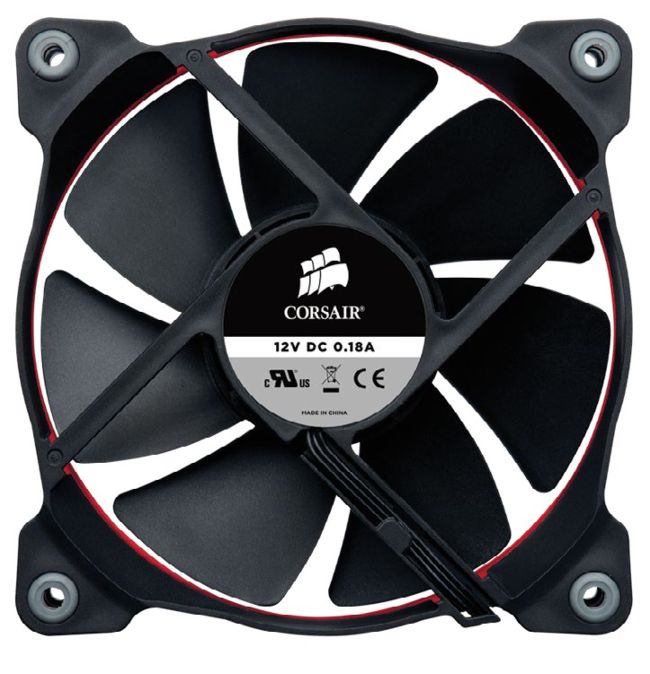
These are the same fans with different blades. The thicker blades are optimized for high pressure, while the thinner blades are for improved airflow.
(05) Fan Management
Luckily, most cases come with one or more fans pre-installed. These are typically stock manufacturer fans, or sometimes fans from a partnered brand. They do the job when it comes to keeping your PC cool, but generally won’t stand up to fans from dedicated manufacturers. If you’re after a silent build or cooling overkill for many sessions of demanding rendering tasks, there are plenty of better options out there than the stock fans. If you plan on upgrading the stock fans, make sure you do this before installing anything else (or simply remove your motherboard assembly as one unit first if you’re upgrading an existing system). Things can start to get tight and awkward inside the case, so it’s best to get any clutter out of the way. Consider keeping the stock fans as well as new fans if you’ve got the room; the more the merrier. If you’re replacing your rear fan with something flashier, you can always push the stock fan to the front of the case to pump up the airflow.