LINUX BA SICS Credit: www.gnome.org
Enhance the Gnome desktop
Fond of standing in the garden wearing a pointy hat, Nick Peers is the perfect person to explain how to set up and use the Gnome desktop.
As you add new apps to your Linux installation, the Launcher plays a key role in making them accessible.
In recent months, interest in Linux has exploded. Increasing numbers of users are finally turning their backs on the likes of Microsoft and Apple to dip their toes into the wonderful world of open source, privacy-first computing. But even if Linux becomes ever more user-friendly as the years pass, it can still be a bit of a culture shock when you scratch the surface.
That’s where this new series comes in. We’re going to provide you with a beginner’s guide to key parts of Linux – perfect for newcomers, switchers and anyone who wants to brush up on their core knowledge. We’re going to focus on the most popular flavour of Linux out there: Ubuntu. We’ll be basing it on the latest version – 24.04 LTS – and that means in this initial piece, we’re focusing on Ubuntu’s default desktop, Gnome.
Take a tour
When you first boot into Ubuntu, you’re prompted to log into your user account. Type your password and hit Enter to find yourself at the desktop. The Gnome desktop employed by Ubuntu will feel at once both superficially similar but also quite different. For those switching from Windows, the key elements are all there, but jumbled up – it won’t take long to orient yourself, however.
The annotation (opposite) reveals the key elements to look for. The Dash on the left provides shortcuts to key apps – Firefox (Ubuntu’s default web browser), the Files app (the equivalent of File Explorer in Windows or Finder on the Mac), the App Store for quickly finding and installing new apps, and the Help tool.
The Dash also displays icons for any external drives (including DVD), the Trash and any other running programs. Open apps are highlighted with one or more red dots next to their icon (one dot per open window), and if the app is in focus, its icon is highlighted, too.
Once opened, favourite apps can be pinned to the Dash. Just open the app, then right-click its Dash icon and choose Pin To Dash (you can remove pinned apps – including default ones – by choosing Unpin instead). The right-click menu is also context-sensitive, tailored to each app – for example, Firefox provides options to open new browser windows (both regular and private). If the app has multiple windows open, choosing All Windows displays thumbnail previews of each – click one to bring it into focus.
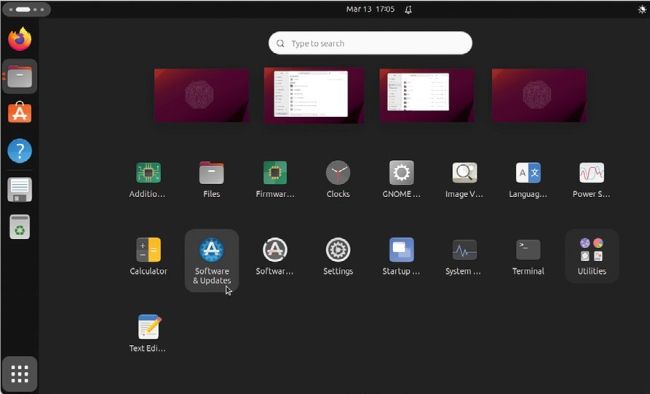
View app list
Apps that aren’t already pinned to the Dash can be found by clicking the Launcher shortcut in the bottomleft corner. This displays the apps across one or more pages, in alphabetical order and accompanied by their icon to aid visibility. Above these you’ll see thumbnail previews of all open workspaces – think of each one as its own separate desktop, enabling you to spread apps across multiple workspaces to reduce clutter, organised however you see fit. The step-by-step guide (page 55) reveals how workspaces work in more detail.