THE GREEN DEVIL
1

4
2
3
5
LENGTH OF TIME:
1-2 hours
DIFFICULTY:
Easy
AH,
a return to normality—sort of, anyway. This might be a new generation of Intel processors, with odd naming schemes and curious performance, but as far as the build process is concerned, very little has changed. It’s all down to the chassis at hand. That’s the real trick with these builds—no matter how you look at it, throughout custom PC building history (it’s a thing, we promise you), it’s the case that dictates all. It tells you what you can install, in what order, how best to route the cables, how to maximize the cooling potential you have, and what hardware to install without thermally throttling. So much of it is reliant on that big old box.
It’s why Geometric’s chassis are so interesting, certainly to this journalist. It’s because of that very element at their core. They’re different. They’re unique. They make you think outside the box, radically alter your build order, and try new things to see what fits and what doesn’t. It’s a challenge, but in a good way. That’s perhaps something that’s unique to those of us who regularly build a great number of these machines; perhaps you just want a simple, straightforward system build, and yeah, the build order on this thing is wildly different, but as long as you approach it with a sensible attitude, give it some time and patience, and follow a good guide, you’ll end up in a very similar place, with a build that looks just as exemplary, if not better.
RE-ORDER THE BUILD ORDER
So then, the first thing we’re going to do, like with all of our
Maximum PC
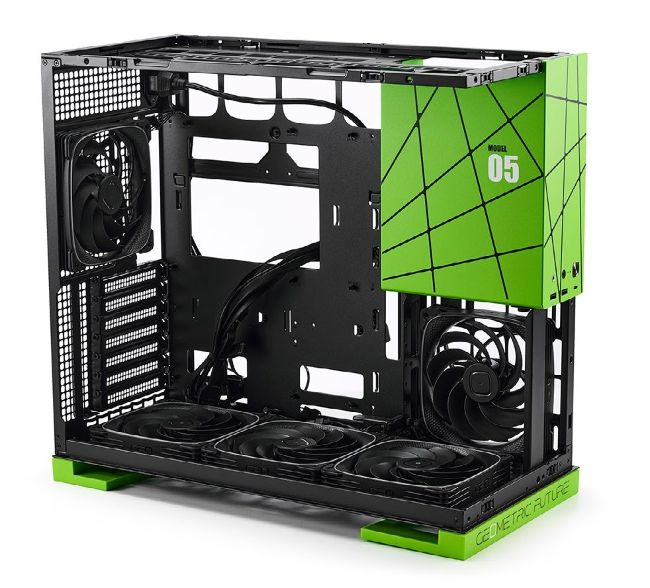
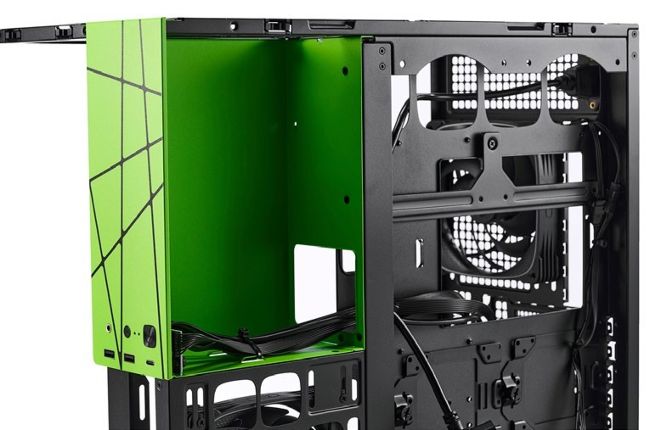
builds, is strip down the chassis to as few parts as we can. We do this for two reasons: to protect those large glass and metal panels that this thing is littered with, and to minimize clutter and ensure we have the maximum amount of cable management space possible (it’s also handy, as it gives us a bit more room to maneuver internally, and the chassis becomes a lot easier to move about on our workspace). The Model 5 is fairly easy to disassemble on the whole. The windows, roof, and rear panel are all entirely toolless, held in by pop studs and clips, and that’s it. There’s a dust filter underneath those three bottom fans, and a funky ‘display mount’ that’s attached to the PSU shroud as well (for displaying tiny miniatures on, genuinely)
(Step 1)
.